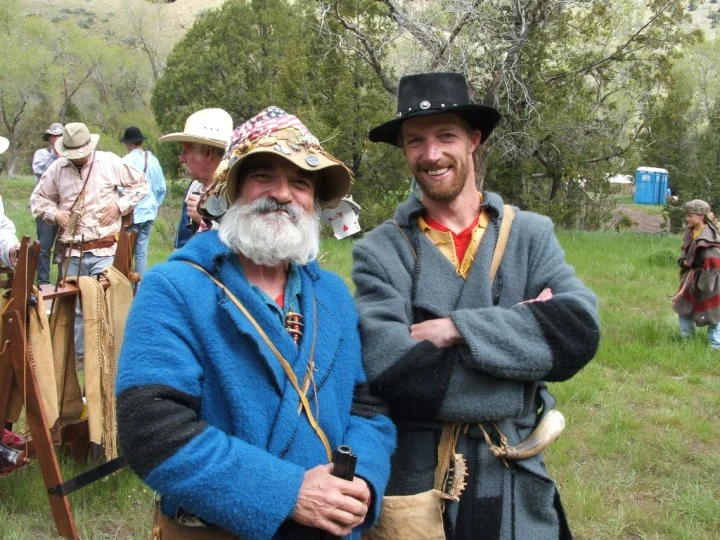
By: Bears Butt
Hey everyone. I think it’s time we made ourselves a fire starting set. What’s in it? You ask. A metal container for some tinder and some char. A piece of flint rock. A metal striker. A bag to carry it all in. AND another larger metal container in which you make your char.
Now what are all these things I’m talking about?
Metal container: This should be a fairly small container with a metal lid that is fairly tight so as not to let moisture in. Moisture is a very bad thing when it comes to making fire using a flint and a steel. My small tin measures about 2 ½ inches across and is about ½ inch deep. I actually only carry my char in it and my tinder in another moisture tight container.
Around where I live we have places where people drop off unwanted items like a charity type store and the store re-sells it for pretty cheap compared to the cost of the item when it was new. In the case of these metal containers, the condition only needs to be moisture resistant and it does not need to be pretty. Actually, you will probably burn the outside paint off when you make your first fire, just to give the container an old timey look.
By the way, while you are in that store, look for a metal container that is larger than the one you are going to carry with your fire starting kit. One that maybe about 6 inches across and 2 inches deep. Actually most any size that is bigger will do. You will understand as we get into this farther just about what you want to pick up.
You probably don’t have to go to any store either. Look around your home. Did Uncle Joe give you a presentation knife that was in a metal container? The metal container in that bottom drawer. The one that used to have a knife in it. Or what about Aunt Diane giving you a container of cookies. Isn’t that made of metal? Get what I’m saying here?
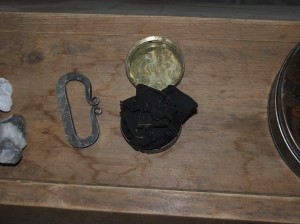
Small Metal Container with Char in it
Now we are going to have fun making this fire kit, so it might take us a while to get it all together. And it isn’t going to cost us anything if we are willing to look around for the items.
Char: Char is “cooked cotton cloth”. It has to be 100% pure cotton, so look on the label of that old T-shirt of yours, the one that is in the rag bag. It can be an old towel or better yet some of those lantern wicks that are used in hurricane lamps. The ones you have for emergency use stuck in your storage area and are filled with kerosene. Ya, those wicks. But to keep costs to zero, just use old clothing or towels. They MUST be 100% cotton.
Cut the cotton up in sizes about 2 inches square and place each piece in your larger tin container. Stack them up until the container is full. They don’t have to be in a perfect stack, they can be scattered in the container, just make sure to fill it up pretty full.
Now put the lid on the container, good and tight. Take a nail, awl, small screwdriver (nail is best) and poke about 10 small holes in the lid of the container. Why are we doing that? Well, we are going to put this big container in a fire and it is going to get hot. When it does, it will start getting the cotton inside it hot as well. When the cotton gets REALLY hot it will want to start burning, but there isn’t enough oxygen inside the container to allow it to burn, so it will smolder. You can tell when it is smoldering because smoke will be coming out of the holes you made. Even some of the smoke might catch on fire as it smokes. This is fun to watch. As it smokes and smokes you will begin to see the smoking slowing down. Inside the container the cotton has almost exhausted itself of anything that could possibly burn, and is turning into charred cotton. The fibers of the cotton cloth will still be visible when it cools down later, and it will be ready to accept a hot spark and hold it. Let it sit in the fire for an hour or so. Be VERY careful after that hour when you are taking the container out of the fire. It will be VERY HOT! Also, if you do not have tongs, welding gloves or anything that can get the container out of the fire without getting yourself burned just leave it in there until the fire is out and things cool down to the touch. It won’t hurt a thing. It might even make the char better.
Tinder: This is dry material that is actually going to burst into flames when we need it to. Tinder can be most anything that is very dry and fibrous. Most mountain men will find tinder under the bark of a softwood tree such as a long dead quaking aspen. Or under a heavy pine bow or thick bush where the grasses and such are protected from the rain and snow. Whatever you get for the tinder make sure you get enough to make a pretty good sized “nest” of it. Something about the size of a softball or even larger will keep your hands from getting burnt when the flames begin to rise.
Let’s say you choose to get your tinder from the bark of a quaking aspen. Peel some of the bark off and the material that was next to the actual tree trunk is very good for use as tinder. Pull some of it off and rub it between your hands.
If you are using dried grass, pull up a sizable quantity and scrunch it into a ball and then pull it apart to form the nest.
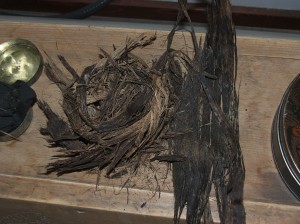
Tinder from under the bark of a quakie
Flint: Flint is a rock that is quite hard as far as rock hardness goes. Flint is found most everywhere in the United States and comes in a vast array of colors and such. When you are out hiking or camping just start looking around on the ground for rocks that “look” like they might be harder than steel. I really can’t explain what flint looks like, but once you find some, you will get better at knowing what sort of rock is harder than steel. If you are having a hard time finding a flint rock big enough that you can use for making a fire, you can always go to a rendezvous in your area and purchase one. Sometimes the guy selling flint rocks will just up and give you one. Those are the best kind. If you can’t seem to locate a rendezvous, go to a rock shop. Almost every medium to large city has one of them.
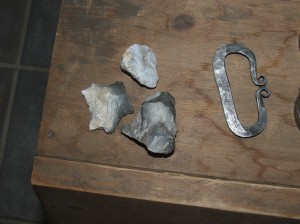
Flint Rock Pieces and Metal Striker
Metal Striker (steel): This will probably be the hardest thing to find for your kit. Almost any type of steel metal can be used as a striker. A small wood file. A flat piece of metal. Broken part off from the underside of a car. Most of the mountain men have strikers that look like a “U” shape. Some are really fancy with twists and stuff, but all of them have at least one surface that is relatively smooth and flat. A good striker is usually about ¼ inch wide and long enough for you to hold it with your four fingers. You have to be able to hold the striker and be able to hit down (strike) on the edge of the flint rock without hitting your fingers or hand. If you hit yourself, it will cut you and you don’t want that to happen. You just might have to break down and go to a rendezvous to purchase one of these. They are usually less than $5 for one and you can try several of them out before you buy it to make sure it fits your size hand (4 fingers).
A Carrying Bag: You can just put all of the things you now have in your pocket and that would suffice as a carrying bag. Or you could gather up an old pair of levis and cut one leg off a bit, then sew up one of the open ends. If you do that, make sure to leave some part of it long enough to be able to fold it over the open end as a flap. Other items that make good bags are marble bags, pieces of leather scraps or even a small purse found at one of them second hand stores. Once you have the bag you can put all the stuff you have for fire making in it.
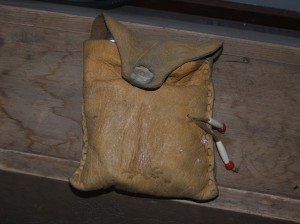
Fire Starting Bag
OK. We should have ourselves a flint rock, striker, char, tinder, a small metal container that is empty and a metal container with char in it.
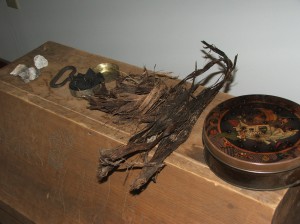
Take some char out of the large container and put it in the smaller container. When you go camping you probably won’t want to carry around the larger container, but you will want to have dry char with you. That is where this little container comes in handy and it will fit inside your bag.
How do we use this to make a fire?
Well, first off, let’s begin with the end result in mind…a fire! Make sure you can have a fire where you want one and that a fire won’t cause the forest to burn down, or your neighbors barn or house to burn. Any living quarters of a home is NOT a safe place for a fire. Make sure you have a fireplace where you are going to build this fire, or are outside with a designated fire pit available and that there are no fire restrictions being enforced. When you have this, gather up some smallish dry twigs and lay some in a cross grid fashion inside the fire pit. Then build up the sides of the grid like arrangement so the twigs create what looks sort of like a loose wooden crate with no top. Gather more twigs and place them along side, but outside, the fire pit.
Next:
Take your tinder and make a nest out of it. It should be cupped with plenty of tinder material all around the cup. It will look very much like a robin’s nest when you have it made about perfect.
Now:
Take a piece (or several pieces) of char out of the container and hold it firmly under the flint rock with your fingers. Pinch the flint rock between your fingers (which are holding the char) and your thumb, which will be on top of the flint rock. Be sure to leave part of the char protruding out and away from the flint; far enough out that when you create sparks they have a chance to fall onto the char.
Then:
Holding the striker with the four fingers and thumb of the other hand and clearly out of harms way (so you don’t hit the flint with your fingers), swiftly bring the striker down against the edge of the flint rock. You should see sparks go flying. These sparks are actually tiny shavings of metal being scraped away from your steel striker. Look at the char and try to see if any of the sparks caused a glowing reddish/orange dot on the char. If none exist, strike down again. Keep doing this until one of the sparks actually does make a glowing spec on the char.
When a spark is caught:
With the char now containing at least one glowing spot, place the char inside the cup made in the tinder. Pick up the entire nest of tinder and carefully squeeze in the sides of the nest around the char, but not so tight as to not be able to still see the char. Bring the entire nest up close to your mouth and begin to carefully blow air into the char. You will soon see smoke coming from the nest as the char cloth gets more and more of its mass glowing. Keep this up until you see flames coming from the tinder nest. (You probably have learned by this time, that you should be blowing into the nest while the breeze is at your back, carrying the smoke away from your face). Now place (or toss) the nest into your stand of fire starting twigs. Bingo!
Fire!
Build the fire up:
Carefully take the twigs you set outside the fire ring and place them gingerly over the top of the fire. Be careful not to smother the fire with too many twigs at the same time. Let the fire slowly build itself up until you have enough fire to start larger diameter sticks and eventually able to burn dry logs.
There you have it! Enjoy your time in the outdoors! Be safe! And when you are done with your fire, make sure you douse it with water, stir it, douse it some more, stir again, and douse it until any and all hint of heat is completely gone AND then cover it with dirt before you leave it.
Your flint and steel fire starting kit will work for you as long as you want it to and your materials don’t get wet.
Bears Butt
June 12, 2011


 Utah Fishing Reports


