By: Bears Butt
My mind is totally on the upcoming elk hunt. I have been Google Earthing the area until I think I’ve worn all the brush and timber off the mountain. I have all the water holes memorized and even though I have never been on that mountain, I feel like I own it. Videos of elk hunting the area have all been watched at least twice and some of them 10 times. I’ve talked to locals about the place, got my exercise routine down so I can pretty much maintain a 5% slope at 7 mph for up to 3 minutes and finally been studying how to field judge bull elk antlers. Why? Heck if I really know, because I’ve never even shot at a bull elk and so any I get will be a trophy no matter if it only has one horn sticking out of its head.
With all of this “elk this and elk that” and a gang of guys going down to help out, I feel a need to give them all a little something as a memoir. I have looked on line for little elk heads and such and when I was able to find something close, it was about $25 and that is way too expensive, even for my good family who are going down hunting with me. You know that $25 equates to almost 4 12 packs of beer. Sorry guys.
So, I had a dream the other morning and came up with a way to give them a token of my appreciation and something that they can keep forever. Now I’d like to show you how to make them!
We are going to make some wire elk antlers! How about that! No, they aren’t going to be so big as to put them out in the front yard as decorations, but you could if you wanted to I suppose. No these little guys will be dangles for perhaps a beaver sharn, or from your rear view mirror. Let’s get started!
Here are the things you are going to need.
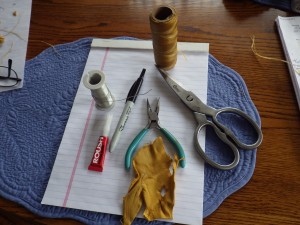
Some 20 guage craft wire, Artificial sinew or nylon string, scissors, Super Glue, Small pliers, Small piece of leather or cloth and in my case a small permanent marker pen. Now to look at all of this and imagine seeing a set of wire elk antlers at the same time, just doesn’t make a lot of sense does it?
I’ll try and make this simple for all you “think inside the box” folks. This idea just came to me suddenly and so here you go!
Pull out some of the wire from the roll and grab onto it with the pliers about 1/2 inch from the end

A 5 to 7 year old bull elk usually has 6 points on each side, give or take and once the animal is mature, each consecutive year they are alive, the antlers just seem to get thicker or bigger around and a little longer. The number of points is usually genetic more so than anything else. So, we are going to make a 6 point bull elk antler set.
For point number one, referred to in “the book” as the G-1 point, bend the wire up toward you, then move the pliers to where you think the point is going to be its longest and bend it back down.

Nice looking G-1 if you ask me!
Take the pliers and move it down to a point straight across from the point of beginning.
 bend it up and then back down…G-2! G-1’s and G-2 points are somewhat similar in length on a real animal, but God made things so that every animal is different in one way or another and so should your wire antler. No two will be identical. Let’s get after the G-3 point. It is usually a bit longer than the other two.

Notice I’m not going overboard with length differences with my set of antlers, but you can do whatever you want to do, they are your antlers and you can make them however you want them to look…pretend YOU are GOD! Now for the G-4. On a real animal the G-4 is usually the longest on a side. Some field judges say you can tell a truly remarkable bull, if the G-4 is long enough, that if you could lay it down toward the back end of the antler (to the tip) and it was that long you had best be shooting and counting total points once it’s on the ground. I can’t say one way or the other, but it sounds like a pretty good theory. G-4!

Nice!
Well, our goal here is to have a six point antler and so I must say that in real life, again, the G-5 point is usually the shortest out of the G-1 through G-5…so let’s bend ours to be a short one and then extend our wire out to where we think the tip of the antler should be and bend it back toward our point of beginning.
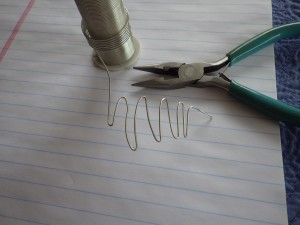

So here we have our six potential antler points.
At this point I like to take my pliers and squeeze down the ends of the points so they aren’t so wide at the tip.

And then we will wind the wire over the lower curves and continue to wind that wire until we get back to the beginning of this antler.
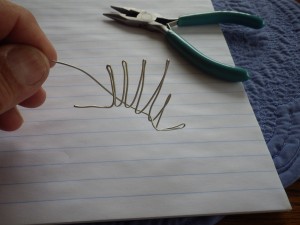
Continue to wrap this wire until you reach the beginning point.

Ok, that is all the wire we will be needing for this side of the antler and so we will snip it off just long enough that we can wrap it around the beginning straight section a couple of times.


At this point it looks like it could be the dorsal fin of a perch.
Well, we really should know at this point just what a typical elk antler looks like and so here is a picture of a real elk. I borrowed this off a “free download” website. Whoever took the picture did a great job! Thank you!
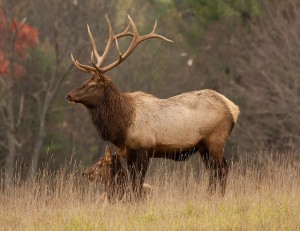
Notice how the G-1, G-2 and G-3 points curve up. My dream of shooting a bull of this caliber is very high! Further study of this particular elk shows it’s G-3 is actually longer than the G-4, on the one side…God interfered again and that is ok.
Let’s bend our “antler tips” to sort of match this real elks antlers.
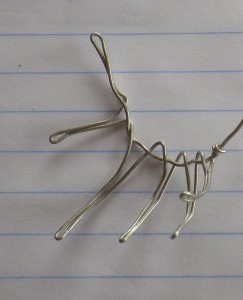
So, now we have one half of the antler set. Go ahead and repeat the steps again for the other half. Remember that when you are bending the other side, it should “mirror” this first side. Ideally a real elk will have exactly matching sides. Each of the “G” points will mirror the corresponding “G” point on each antler, be the same length, the same curvature and the same thickness. Antlers like what I have described really add up points in “the book”. You will want to make sure yours are pretty close to the same.
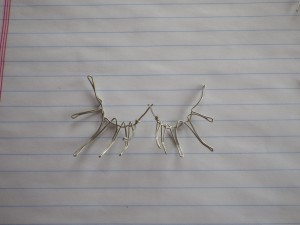
Once we tie these two sets together in the middle, we can straighten up the points and get down to the artistic side of making them match as closely as we can.
Put them together and get to wrapping them tightly.
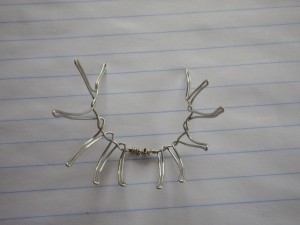
You know, these don’t look too bad do they?
So, in real life, if you had a nice set of elk antlers like this you would want to display it on the barn wall, or in your home or somewhere. The part you just wound together would actually be the crown portion of the elk’s skull and you could (in reality) leave it bleached white or you could cover it with something to cover it up. Since these are wire, we will want to cover them with something to hide the twists. I like to use scraps of deer leather, but cloth would work just as well.
Cut the leather just slightly larger than the wrapped wire portion and super glue it in place, making sure the connecting point is going to be hidden “behind” the antler.
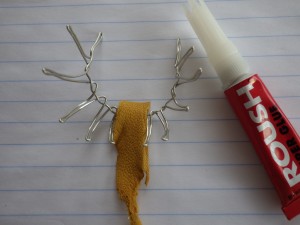
Now wrap the leather and trim it off.
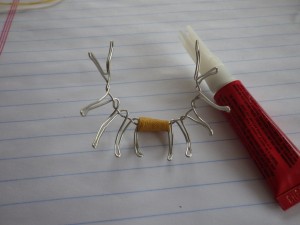
Look’in Good!
Well, you are so close to being done it’s amazing. Aren’t you proud of yourself ? You should be! You did a very good job and it almost looks like real elk antlers…well, wire ones at least. It’s time to tie on the sinew or nylon string. In my experience, I found that tying the string through the openings on the G-5 points make the antlers hang more normal. Make sure you get the “square knot” good and secure so it doesn’t fall off.
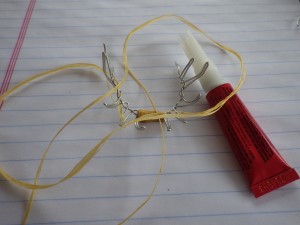
There you go! All done and ready to hang.
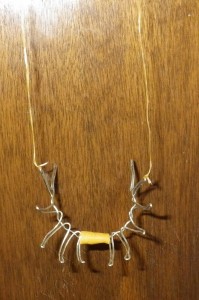
I also did some experimenting with some old wood and tacked some on it. They turned out pretty cool too.
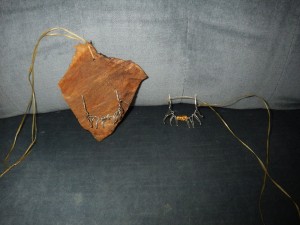
And so there you have it. Easy to make, fun to do and will be the envy of all your friends! They will be asking you to make them one. Just turn them onto this web site and have them make their own! Bears Butt Dot Com.
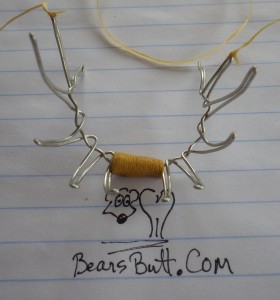
Hey! That’s me!
Bears Butt
Oct. 21, 2013

 Utah Fishing Reports