By: Bears Butt

Canting

The past couple of archery practice rounds in the field has found me experimenting with hunting situations.  After all, that is my intent of doing all of this archery stuff in the first place, right?  On Monday evening I had the place to myself and I shot 10 ends of 5 arrows in the usual fashion, standing tall, shoulders relaxed, a firm anchor, eyes fixed on the X etc., etc…and of course my arrows went where ever good arrows (and bad arrows) like to go.  Some finding the mark and others finding somewhere else they would rather go.

After the session, I was still not tired of shooting and so I decided to start my “hunting training”.  This is a little something I’ve been thinking about for awhile and even though the temptation to move back 10 yards was still in the back of my mind, I decided to stay at the 20 yard mark and move around a bit.

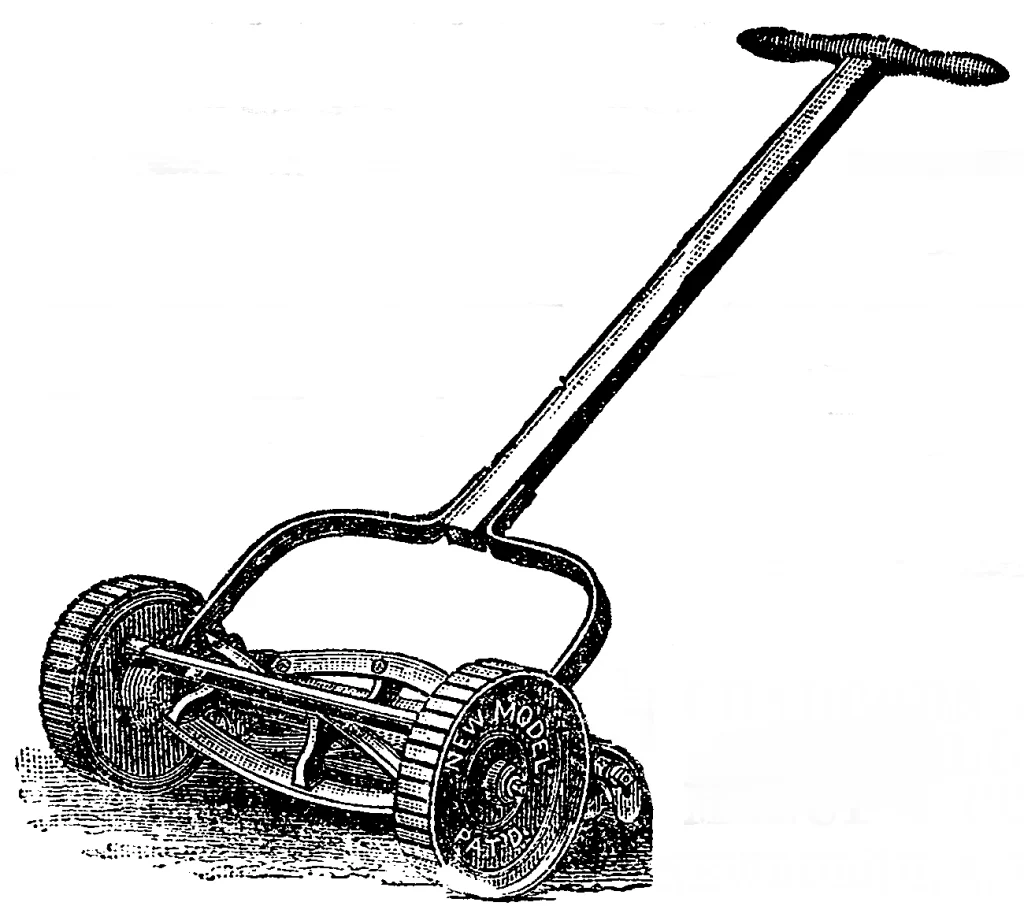
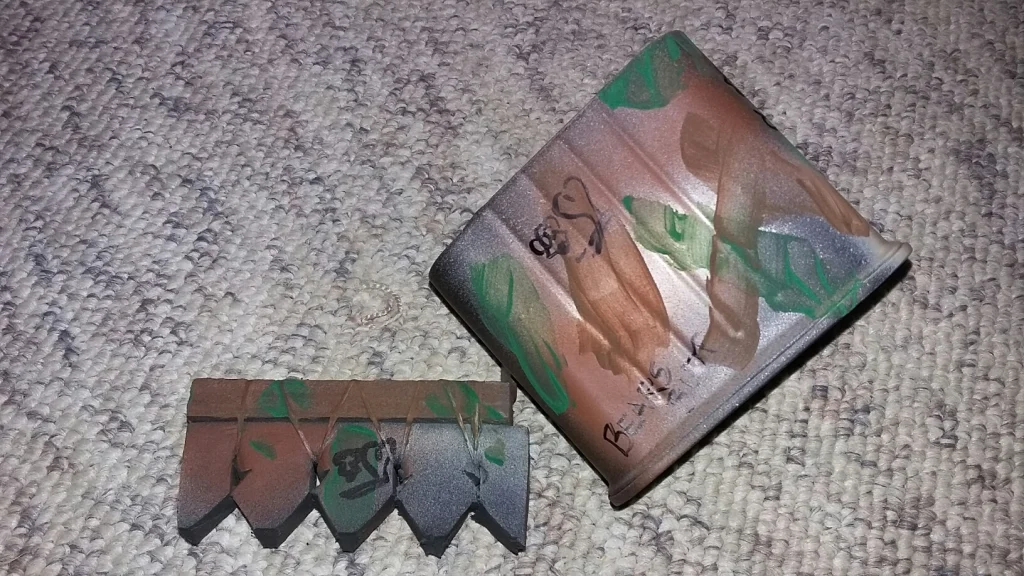
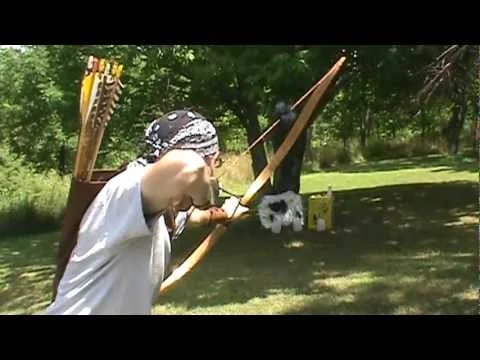
Let’s think about hunting for a moment.  Chances are I will be sitting in a ground blind somewhere hoping that a deer or elk will come wandering my way.  With that in mind, sitting would be how I would most likely have to take my shot.  So, with a stump marking the 20 yard mark, I perched my Bears Butt’s butt on the stump.  Sitting at a 90 degree angle to the target, I shot my 5 arrows.  Of course I had to “cant” my bow so that the lower limb did not strike the ground.  Much like the guy in the picture above.  What came as quite a surprise was that all 5 arrows were very close to where I wanted them to hit.

In a college business class we read about a study that was conducted back in the 1930’s wherein they turned up the lighting in a production facility in order to see if that would increase productivity and the records show it clearly did cause an increase in productivity.  In a follow-up study in the same place a year or so later, when productivity went slowly back to what it was before the lights were turned up, they dimmed the lights and sure enough, productivity went up….how can that be?  Well, anyway, my point is, when you change something you can expect a change in the outcome.  I can’t remember the theory’s name but it has one.  I’ll make one up…The Hurculerian effect….that is not the real name but you get the idea.

So, were the 5 arrows being close to the mark a result of changing things up?  Perhaps.

Well, I kept turning my butt on the stump until at one point in order to shoot at my target I was almost turned completely around and still the arrows came close to finding the X.  Now, mind you, I’m shooting at a cut out of the center of a larger target.  My target is about 8 inches across.

Well, not to be outdone by the stump sitting exercise, I started walking around the 20 yard mark, getting down on both knees, then with one knee up, switching which knee was up and on and on.  I moved from 20 yards, to 25, out to nearly 30, shooting diagonally at the target….well, in general, I was having quite a time entertaining myself with this new way of practicing and before long I realized I had to go home and cook supper!  But here again, my arrows were almost always finding their mark near or actually inside that 8 inch circle!  I failed to take any pictures even though I thought about it several times that evening.

So, last night Sherry and I went down to the field range once again.  I shot 5 ends of 5 arrows, while she shot all her ends with 6 arrows.  After my 5th end, I decided to “do my thing” and mix things up a bit.  I started with the stump sitting and then started moving around.  I didn’t move around as much as I had the night before, as I was causing panic in Sherry, not knowing exactly where I was and what I was doing around her.  I was being safety conscious the whole time and keeping her well being in mind the whole time…she just didn’t know that.

Pretty soon she had had enough and was wore out.  It is sort of funny that when archery fatigue sets in, it sets in fast.  You go from  some very nice groups to wide groups and arrows flinging where you wonder how in the heck they could possibly go there.  But for me, things were tightening up.  The more I shot the better things were getting….what gives with that?  I was feeling like I could shoot forever.  Those 55 pound limbs must be weakening, as there was no fatigue what-so-ever!

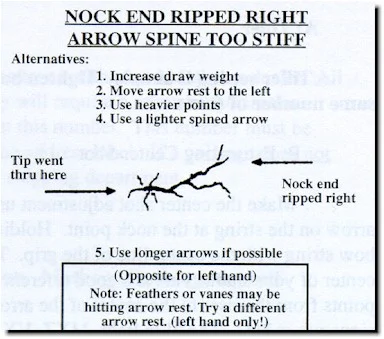
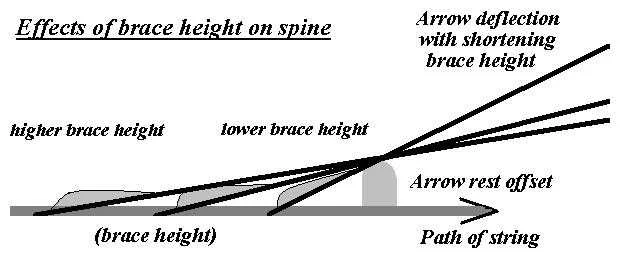
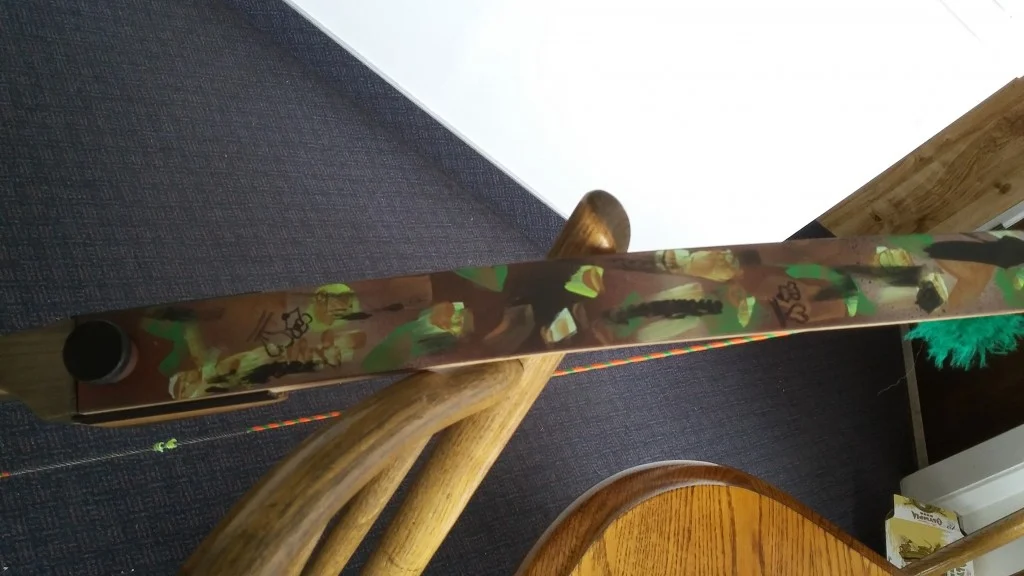
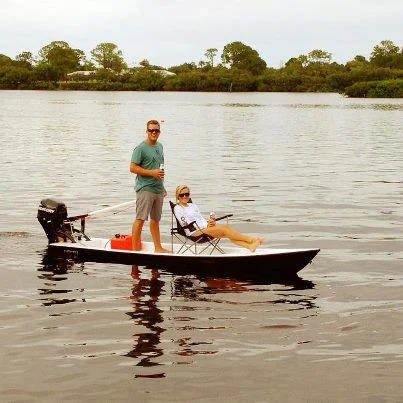
Back to the “canting”…….Canting the bow means you turn the bow so the lower limb won’t hit the ground, or a stick, or a bush, or a anything that it might hit.  I suppose, you would cant the bow if the upper limb would hit something as well….of course you would.  Now, since I’m a right handed shooter, my canting has to be done with the top limb turned to my right.  That way the arrow will stay on the arrow rest, or at least on the bow shelf somewhere.  If I was to cant my bow the other way the arrow would fall off the rest and there would be no shot…..gravity has something to do with that.

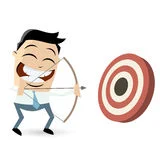
I also found that while canting my bow, my anchor being very much the same as if standing erect (like an Olympic archer below)

A general view of the Men's Individual Archery Ranking Round at Lords Cricket Ground, London.

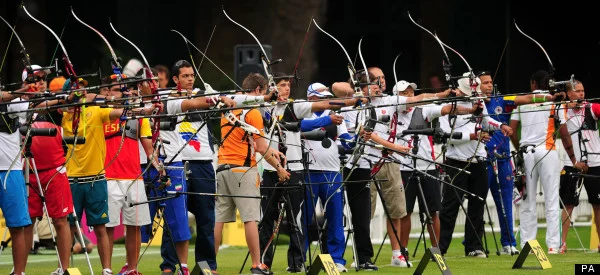
A general view of the Men’s Individual Archery Ranking Round at Lords Cricket Ground, London.

I was actually looking above, but at the same time, down the shaft of the arrow, even though it was not in sharp focus, but certainly in my vision as I stared at the X on my 8 inch target.  I got the feeling that as I stared at that X, the bow would rise and/or lower to accomodate the distance to the target and then upon release the arrow would arch toward the X and sometimes actually hit it!  I was having a pretty good time.  My arrows were actually trying to go where I was looking.  Have I just experienced one of the plateaus in archery I have read about?  You know, you go from not hitting the bale, to all the arrows hitting the bale, then to hitting the full size of the paper the target is printed on, to hitting the circles drawn on that paper, to hitting certain rings within the drawn on target etc., etc.  And then come consistency…plateaus happen with that as well and some archers give up on themselves it they can’t break through whatever it is that causes them to not hit what they are shooting at.  Not me!  I’ll shoot no matter what and someday it will straighten itself out.  I’m a Plucker and if that is what I do, so be it, as long as I pluck and hit somewhere close to where I want to hit, call me Bears Butt the Plucker!

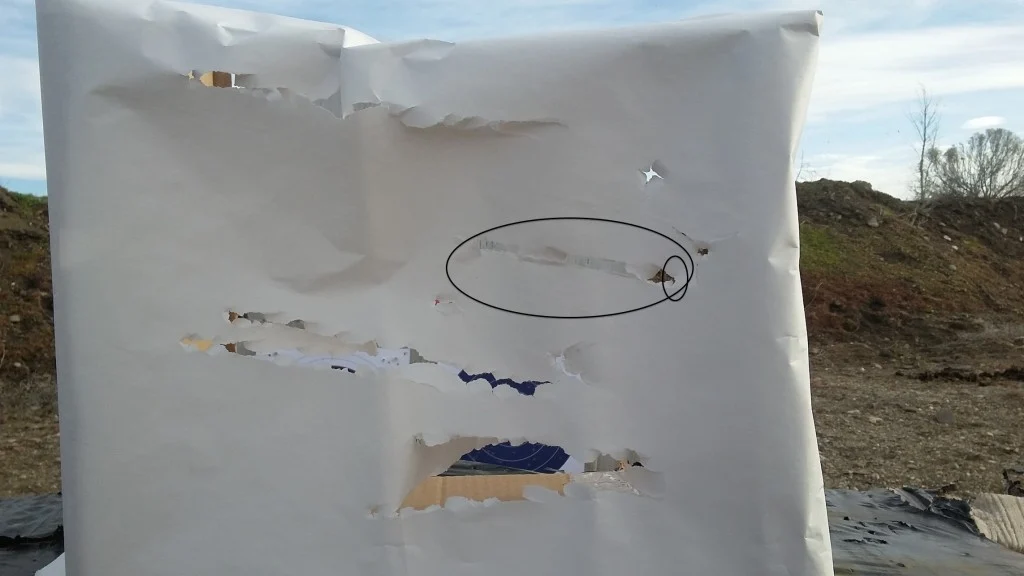
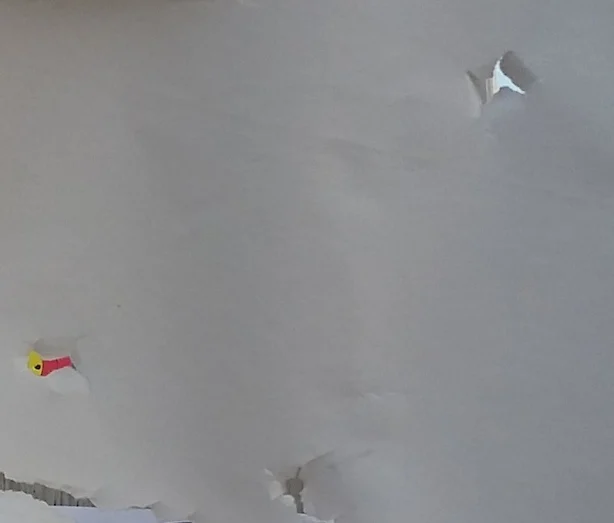
Anyway, back to the subject….what is the subject?……Oh ya, me walking around shooting, sitting and shooting, kneeling and shooting…hunting situation stuff.  So, Sherry and I are shooting and she got tired.  I was still going strong and decided to shoot a couple more ends.  I was feeling very good about the whole thing.  Not tired.  Not feeling the usual strain of the 55 pound limbs.  My anchor was coming to my jaw just like it should.  My head would cock to one side and find that anchor and the string would find my nose.  AND best of all, the arrows seemed to find their mark.  Here is my last end from last night!

LastEnd4:19

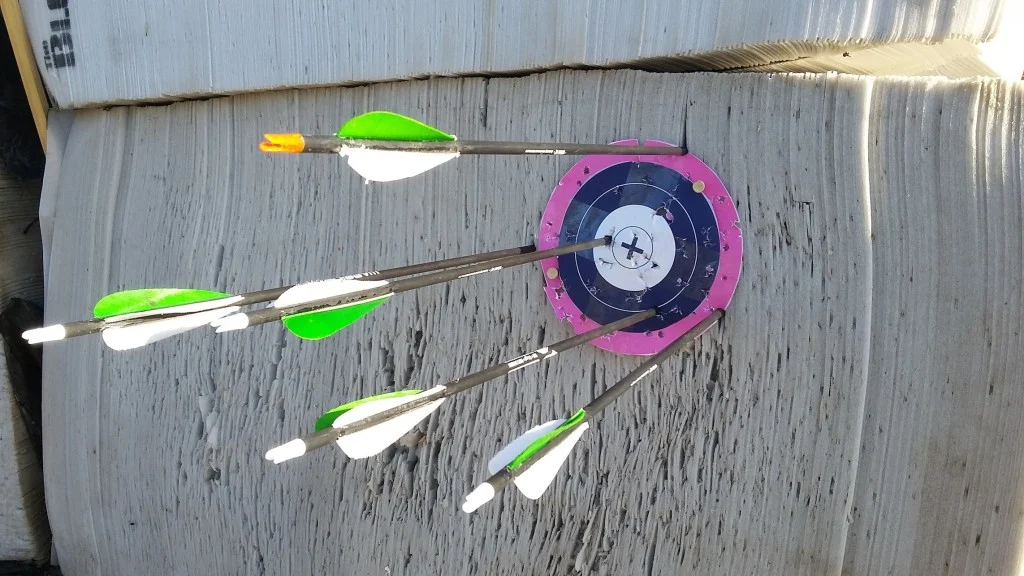
I wish I could do that every time!

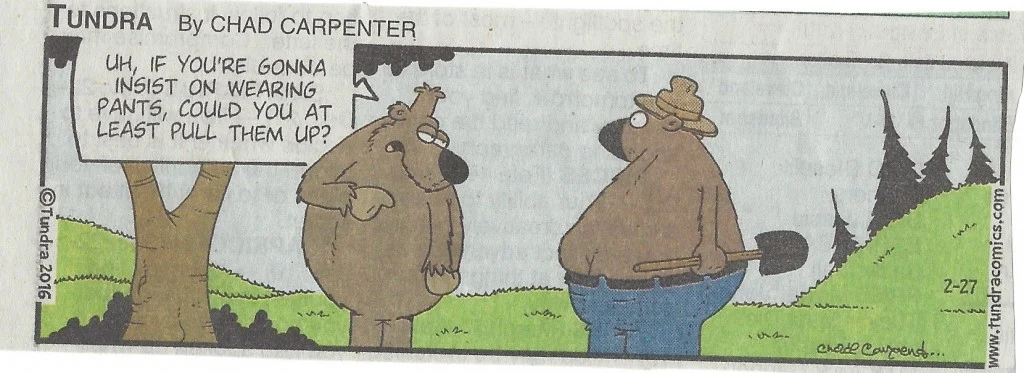
Maybe I need a hat like the guy in the picture above!

April 20, 2016

Bears Butt


Written on April 20th, 2016 , Archery stuff
By: Bears Butt

When something really strikes me as funny, I have to put it in my “jokes I like” category.  This one struck me very funny this morning…maybe it’s just my mood.

TestingForSugar

I hope you enjoyed it!

April 17, 2016

Bears Butt

Written on April 17th, 2016 , Jokes I like!
By: Bears Butt

ReelMower

Last week word came out that the Utah Department of Environmental Quality was offering a special “exchange” for gas powered lawn mowers and weed eaters.  In their writeup it said that a gas lawnmower polluted the air about the same as driving over 100 miles or so (I don’t recall exactly the distance you would drive a car to equate to mowing your lawn, but the distance was substantial).  With that, Windy, Weasel and I began our dialogue.

Do we want to play in this program or not…yes.  Do we want a couple of lawn mowers and a couple of weed eaters….yes.  Ok, let’s work out the logistics.

I read and re-read the rules and came to the conclusion that in order to “play”, we would have to put up the full purchase price on our credit card to the tune of $550 for a lawn mower and a weed eater.  Then after the exchange of a gas mower and weed eater (gas and oil removed), they would credit us with a substantial amount of credit for both and the end result would be a lawn mower for $100 and the weed eater for $25.  The credit would be applied back to the card in one weeks time after the exchange.  Windy read and surmised the same as I.  They had roughly 1,000 mowers and 500 weed eaters for this program.

So, this morning was the day for pre-registration and the paying of the money.  Beginning at 8 a.m. and only on line at the DEQ website.

Windy showed up at 7:58 and we logged into the site….at 8:01 (our time), the site opened for business and Windy was rocking his purchase of one lawn mower and one weed eater.  In the end he reserved his two units and only had to pay for the two finished price units plus sales tax, $133 and some change.  A very welcome surprise for both of us.  When he logged in, we found we had to pick a time for the exchange on April 23 (Saturday).  He chose 9:15, as the 9 O’clock time was full.  Now it was my turn to log in and make my purchase of one weed eater.  The rules would only allow one household to purchase one mower and one weed eater or one only of your choice.  Well, we really wanted to end up with two weed eaters and one lawn mower anyway, so I was to go on and buy one weed eater.

He logged out, I logged in….but the wait for the website to upload was not going well.  We waited and the little wheel on the tab turned slowly on my Chrome browser.  Then it crashed.  I tried again with the same results.  So I switched over to Firefox and tried.  It came up!  YEAHHH!  But then when I went to register the earliest time was 1 p.m.!  NO WAY am I going to go back down to Salt Lake city at 1 p.m. to pick up my weed eater!  I opted out.

By my computers time it was 8:19…19 minutes from the start of registering and they had only 23 lawn mowers and 4 weed eaters left!  19 minutes!!!!!

So, what did we end up reserving?  Well, of course one lawn mower and one weed eater.

KobaltLawnMower

A Kobalt 40 volt electric lawn mower!  And a Kobalt 40 volt electric weed whacker!

kobalt-40v-max-ope-string-trimmer-edger

We will see how well they hold up, but the lawn mower comes with a 5 year warrantee.

Not a bad morning if you ask me.

Bears Butt

April 13, 2016

Written on April 13th, 2016 , Uncategorized
By: Bears Butt

HappyArcher

When I first picked up my bow and began to shoot, my mentor, Lynn Hayes, told me that what I was being told was all well and proper, but that as time goes on I will enjoy the sport more if I experiment with different aspects of the game.  He went on to say there are SO MANY variables that what might work for one person, might not work for me.  And so, here I go trying different stuff.  Keep in mind my goal in all of this is to kill a buck deer as humanly as I can using my bow.  So, right now my goal is to get my bow and arrow set up to be what they need to be and then the rest is all up to me.

Sure, I have quite a few arrows, all of which are in the 500 spine group and I’ve got people telling me I need to be shooting 400 spine arrows out of my bow.  Well, the other night I asked Weasel to bring down some 400’s he has in his arsenal.  In the mean time I made up a paper holder in order to test “bare shaft shooting” through it.

There are TONS of videos and more than that of professional archers using “paper tuning” to determine if your arrows are too weak or too stiff for your bow setup.  So, what better way to find out if my 500’s are too weak or not.

The way this is done is pretty simple.  You have a good arrow stopping bale that you are shooting into and you keep that where it is.  Then in front of that bale about 5 to 10 feet you place your paper.  In my case it is a cardboard box with just the bottom and two sides attached.  Across the open portion of the box I stretched some butcher paper and taped it good and tight.  Well, not too tight, but good enough.  Now to complete this test, the archer stands about 10 feet away and shoots into the paper.  The arrow will pass through the paper and then stick safely into the bale behind it.

Why would you want to do this?  Well, according to all the stuff I have read and all the videos I have watched, the arrow should pass through the paper with a single hole punched through the paper.  Being that close it makes perfect sense that a single hole would be exactly what you would see after the shot was made.  NOT NECESSARILY SO….remember “Archers Paradox”….the science of the arrow flight once it leaves the string of the bow?  The arrow has to flex and go around the riser (handle) of the bow.  How much flex is directly due to the amount of pressure the string is pushing against the back of the arrow and how much resistance there is in the shaft of the arrow that tries to keep the arrow from bending at all.  If you have a broom handle for an arrow, you can clearly see it is not likely to bend once you release the string.  On the other hand, if you have a straw (long enough of course), it would probably break when you release the string.  So, somewhere between those two extremes lies an arrow shaft that will be perfect for your bow, string combo.  That is what I am trying to find right now.

OK.  So, I set up the box and stood back about 10 feet, sipped a sip of my beer, set the can down and shot my first 400 spine arrow.  The arrow has no feathers on the back, just a bare shaft.  THWACK!  Holy crap!  A rip in the paper about 15 inches long!!!!  Let’s try that again!  THWACK!  Another rip about 7 inches long!  Let’s look at them.

BareShaftShootingButt


You can see several rips in the paper in this picture, but my first two shots were the middle two.  Let’s look closer at these rips.

PointsHitLeftr

The field tips on those arrows hit the paper to the left side of the rip.  What does that mean?  Actually, what does that mean to ME.  To you pros out there I can hear you saying a lot of things.  It’s my form and I plucked the string, which would send the arrow across the riser to the left…It could mean the arrow smacked the riser and sent the arrow left, a direct cause of a poor release as well and I’m sure there are a hundred other things this means…but to ME, it means the arrow could not bend around the riser and is too stiff for my bow.

In the world of knowledgable people dealing with this their pictures show this:

PointLeftRip

Of the 4 suggested solutions listed, I can only do two of those.  1:  Increase draw weight…I’m maxed out for me at 55 pounds.  2:  Move arrow rest to the left….My arrow rest sets on the shelf and unable to move to the left.  3.  Use heavier points….I was shooting 125 grain points for this test and even if I went to 200 grains points the result would not be enough to straighten the arrow up to make a single hole in the paper.  4.  User a lighter spined arrow…..now this one makes the most sense to me at this point.

Well, this science is not complete with only this test.  But let’s look as Weasel and his arrows for a second, before we move on.

Weasel shoots a compound bow, you know, the kind with the wheels on each end of the limbs.  He can manipulate his draw weight heavier or lighter.  He can change just about every dynamic there is in archery.  He can, with much manipulation of all the controls, make himself look like he really knows what he is doing when it comes to archery.  He can adjust and re-adjust until he could hit a small dinosaur at 70 yards every time!  (I had to toss that in because my little dinosaur was shot to pieces and buried somewhere on the farm, not by Weasel, but by his daughter and her friend, they shoot compound bows too….manipulation you see).

'I forgot the arrow.'

‘I forgot the arrow.’

Well, Weasel thought this paper idea was pretty cool and he too wanted to see what some arrows he had in his arsenal would do with his current setup.  So he shot into the paper using those same 400 spine arrows that I used.  His results were just the opposite of mine.  His points hit to the right and the tear went to the left.

BareShaftShootingButt

His shots were the lowest one with the very big tear (actually there are three shots in that tear, two are mine and one is his) and the one above my two in the center and to the right.  I can’t show you the lower shot he made because it just isn’t as clear, so I’ll just show you his upper shot.

Weasels400SpineShot

So, his point is clearly to the right side of the tear, which shows the arrow to be too weak for his bow.

PointHitsRight

So, with his setup, the 4 suggestions would be to decrease his draw weight,  move his arrow rest to the right, put on a lighter point or go to a stiffer spined arrow….all of which he could do.

Well, after a couple more brews, and talking about these rips in the paper, we decided to shoot our current arrows through the paper just to see what that looked like.  These are the arrows we have been shooting for months.  His has plastic vanes on and mine are feathered fletchings.  The results!

Weasel3ShotsWithVanes

These are the three holes Weasel shot with the vanes on his arrows.  Pretty much single holes, which says to me (us), he is shooting the correct spined arrow for his bow set up.  As for my arrow, well I shot one time and was happy.

ButtsOneShotWithFeathers

A single hole and the tears from the feathers radiating out from that.  I’m pretty happy with that.  Here is some more info, just because I found it and thought you might be interested:

tuningguide

OK, now for the “there is more to this” aspect:

It’s kind of nice to know this method is out there and you can see results of the “that’s impossible”.  How can an arrow fly sideways for 10 feet and then hit pretty much straight on in another 10 feet?  Well, it does and it’s all about archers paradox and a myriad of other things.

Bare shaft shooting tells you a lot about your arrows and how you have your bow “tuned”.  I’m sure this applies to shooting a recurve or long bow, but for sure it applies to they archers with the “training wheels”.  You take your vaned arrows and shoot them into the target.  And then take the same arrow without vanes and shoot them at the target.  Ideally they will hit in a group, but what if they don’t?  Look at this:

tuning-lr-broadhead-tuning

For my recurve bow, a lot of what I’m seeing has more to do with form than most anything else, but I still have to be concerned with my brace height as well.

brace-height

The manufacturer of my bow says that somewhere between a brace height of 7 1/2 and 8 1/2 inches I will find that spot where my arrows will shoot like they are supposed to shoot and I found a rather complex drawing of what happens when the brace height is too much and/or too little for the spine of the arrow I’m shooting.

brace height - spine

I’m still not sure what this is trying to tell me.  I looks like a lower brace height will cause the arrow to shoot more to the left….anyone????

So, just to add to this confusion, I decided maybe I should shoot like this for awhile:

UpsideDownShot

At least you know I’m trying!

Bears Butt

April 10, 2016


Written on April 10th, 2016 , Archery stuff
By: Bears Butt

cartoon arrows

Ya, those look about right to me!  Arrows.  Let me be perfectly honest about arrows and bow shooting…………………………..CONFUSING!…………………………….

I have learned that the more I know about shooting a bow the more I want to know about shooting a bow.  And the more I know about the physics of shooting that arrow from that bow, the more I want to know about the physics of the arrow being shot from that bow.  I want to know what the effect the string has on the flight of the arrow, the effect it has on the tips of the bow itself and the dynamics of the “what if” I pluck the string to my right….to my left….to my up…to my down….(I’m a pretty good little plucker).  I’ve said it before…there is a whole lot more to shooting a bow and arrow than meets the eye….never look the point of the arrow right in the eye….

We all know the internet is FULL of good stuff.  There is something for EVERYONE on it and I for one use it alot!  I try and share as much as I can with you as well and I hope some of it has been useful to you.  But there is ONE big thing missing and maybe it is my calling to fill in this gap….NOWHERE is there a chart, a graph, a youtube video or anything that asks….Hey dude!  Ya YOU!  What bow weight are you shooting?  What is your draw length?  What kind of arrow shaft do you like to shoot (wood, carbon, aluminum, titanium, fiberglas, ford, chevy)?  What is the type of string you shoot on your bow (fast flight, dacron, toolie root)?  Are you shooting a compound bow?  Recurve?  Longbow?  Sling shot?  NOWHERE is there the question about “how long have you been shooting a bow”!  Do you shoot using a release?  Three fingers under?  Split finger?  What’s your mothers maiden name?   None of that!!!!

So, after 15 months of shooting my bow and arrows….I’m still not sure I’m shooting the arrow I should be shooting with my bow.  Maybe it is part of the learning curve being instilled by those who actually know.  My initiation so to speak.  Rather than dunking me in a dunking tank filled with pepsi rather than beer, I am being initiated this way.  I think others feel the same way.  AND I think that is why a lot of “traditional” bow shooters break ranks and pick up the compound bows that have the little wheels helping with the “let off” and the sights that help with “aiming”….all the big boys shoot those bows and know exactly what spine weight arrows to shoot, exactly what vanes to have on the nock end, what points to have on the leading edge.  But with us traditional guys, it is all up to us to figure it out.  Go to the arrow/bow store and look around….300 spine arrows are everywhere….fancy triggered releases for a nominal fee….strings that are guaranteed to “fit” your bow.  Charts and graphs and pictures of guys and gals with huge trophies and sponsorships abounding everywhere.

Go to a traditional bow shop, tucked back in the corner of the ghetto (low rent) area of the city, suburb, county or remote area on the edge of a wilderness, and you see, Joe Traditional, sitting there making his own string, whittling on his arrows or pulling his new fletchings from the wing of a turkey he just shot that morning.  He may even have a set up to knap his next set of arrow heads from the flint rock he picked up while turkey hunting.

I’ve learned in this short period of time, Traditional bow shooters are a little bit of a different breed of cat.  They speak softly and always refer to you (and themselves) as a “trad”…short for traditional….shooter.  Then eye ball you up and down and look over your stuff.  Always there is a comment sent your way to see what knowledge you know about the “old guys” of the sport.  Guys like Fred Bear (the Jim Bridger of the group), or Jim Hill.  I love it.  And of course I know nothing about these guys, but I do love to listen to a couple of “trads” trading stories and telling what I think are outright lies.  Trying to convince me (the know nothing new guy) that they know it all and are about to educate (I almost spelled that Edjukate) me on all of this stuff.  Which they will and I will try and learn.

OK.  So I’m a Trad shooter.  One who is going to, hopefully, take his first and probably only mule deer buck using a recurve bow.  I need to know what is going to be the “right” arrow to use.  I’ve already decided on the broad head.  A single bevel made by Badger and probably in right bevel (Now I’m getting somewhere…you don’t have a clue what I’m talking about….gottcha!).  125 Grain!  Gottcha agin!  And I’m going to be fletched (gottcha) with right helical, right wing barred cock feather and right wing hen feathers in white….gottcha!  Damn it is so nice to know what I’m talking about!

But what about the arrow?  The shaft!?!  Someone please give me “the shaft”, I should be shooting!!!!!  I’ve been getting the shaft most of my life, but right now knowing exactly what shaft would be nice.  Arrow shafts come in “flexibilities” from “whip sticks” (the kind you hated as a child), to stiff as a board shafts (the kind you order to build your house but come somewhat less stiff than you thought you ordered).  They measure these pretty much the same, but record and report them in different ways, depending on the manufacturer.  Wood shafts?  10-20, 20-30, 30-40, 40-50, 50-60…or something like that.  Aluminum shafts?  1616, 1816, 2016, 2116, 2216…..repeat….  Carbon shafts?  3035, 400, 150, 5575……………OH MY HECK!

And then there are the ends of the shafts.  Do I want a screw in point?  A glue on point?  A glue on nock?  A nock that presses into the shaft of the hollow arrow?  Do I want fletching made of real turkey feathers or plastic or rubber?  How long should those fletchings be?  2 inch?  3 inch?  4 inch?  5 inch?  Straight?  1 degree offset?  Helical?   AHHHHHHHHHHHHHHHHH!

What happened to the day of Geronimo?

Me.. want.. simple!

And so, my thought on all of this.  As a beginning archer.  A simple…yes simple…chart that shows me what I want to know.  I enter my bow weight as manufactured.  In my case 55 pound limbs.  I enter my draw length.  As measured by pulling my bow back with an arrow hooked to the string and measuring the distance from the string (inside the nock) to the “target” side of the bow (my draw length).  I enter my “desired” arrow point weight (100 grains, 125 grains etc.).  I enter my desired fletching size and type.  (3 inch/4 inch etc., straight, offset, helical).  And VOOOOEELLLLA it tells me I need to order and shoot, X in wood, Y in Carbon, Z in Aluminum, Q in Fiberglas and P in my mothers maiden name.

I have been on a couple, well maybe several traditional (trad, get used to it) forums and for the life of me, they are adding much to this confusion.  Looking at the arrow spine charts in the books and on line I feel that the spine I should be using is 500 spine for my weight of bow and my draw length, but I’m pushing into the 600 spine zone.  So, with adding or decreasing the weight of my point I can soften or stiffen the spine until my bow likes it.  (Sort of like having a new “one year old pit bull dog”.  You keep feeding it with different stuff until it quits biting you and likes what you are feeding it).  But lately I have found this one Trad forum where the guys/gals are shooting 600 spine arrows out of their 40 pound bows and 200 grain points up front and getting exceptional results down range!   THAT CAN’T HAPPEN FOLKS!  NOT FROM WHAT I’VE READ!  NOT FROM WHAT I HAVE EXPERIENCED IN MY OWN TIME!!!!   NOOOOOOOO!!!!

As I calm myself I ask, how can a 40 pound bow shoot a 600 spine arrow with 200 grains up front and hit anything it is pointed at….NOPE…can’t happen!  Not when my bow is shooting roughly 47 pounds and 500 spine arrows with 125 grains up front and doing “pretty good”.

Keep in mind…more weight up front makes the spine of the arrow “weaker”.  Will the difference of 7 pounds of draw weight make that much difference in arrow dynamics from a 600 spine and a 500 spine against a 200 grain tip and a 125 grain tip??????

I need a good psychiatrist and someone to make this simple chart and post it on the internet………………………….soon.

I had to get this posted before April 1st or someone would think I was pulling an April Fools joke!

March 21, 2016

Bears Butt

Written on March 31st, 2016 , Archery stuff
By: Bears Butt

It’s raining and snowing outside and no reason for me not to continue to get ready for the archery hunt coming up in 5 months….that seems like a long time but for me it isn’t.  I have lots to do, especially practice shooting to be ready for the hunt.  Part of that preparation is getting my bow camouflaged.  I’ve been putting a lot of thought into it lately and there are lots of ways I could go.  A good camoed up bow could look like this:

men-camouflage-bow-tie

Where did that come from?  Not a camo bow tie!  Good grief.  Has my site been hacked?  Is my guardian FortiPress not working?  Everything is fine folks.  I put that one in to get your attention.

Camouflage has been around a goodly length of time and it has and is changing constantly.  New ideas keep popping up as to what the clothing and other cover-ups need to look like in order to hide you the best.  It mostly catches the hunters as I don’t think we know what the animals are seeing.  We could be standing out like sore thumbs.  I know of at least one hunter who doesn’t believe in camo much and wears his plaid shirts and relies on being down wind from his game.  He is a good “killer” of animals as well, so his methods work.  I personally like to look the part.  You know the guy in the truck all camoed up from the top of his head to the bottoms of the soles on his boots.   You never know when you are going to have to sneak up on the beer cooler.

Well, my choices are plenty as to how to camo my bow.  I could buy some of the commercially made wrapping tape.  It goes on quickly, is quiet in the brush and comes off without leaving a big mess.  It comes in a variety of camo patterns too, more than one would know for sure and it would take me all day to figure out which pattern to buy.

Camo_Tape_Hunting_Stealth_Gun_And_Bow_Camouflage_Cloth_Tape_Flexible_14.5_Feet_Per_Roll_-_2_Rolls_large

These are very nice and I got to use it a couple of years ago on the turkey hunt.  Weasel let me take the shotgun with it wrapped on.  It was easy and sure enough hid the shotgun well.  So well in fact I could have lost it when I set it down once to go relieve myself.  It’s funny how camouflage works.  Here you are sitting in your spot up against a tree and along comes another hunter and takes a leak right on you.  Of course he has to go drop his drawers and clean up after you cough and move.  Ah yes!  Camo!

There was another very tempting type of camo for my bow limbs.  It is made like a skinny sock and you take the string off the limb and put the sock over it, then put the sting back on.  The tension of the string against the sock,keeps the sock up tight on the end of the limb, while the lower part (closest to your bow hand) fits snug against the riser.  Again, they come in all the patterns out there.

CamoLimbSock

There are even “ghillie suit” kinds, with all the loose “leaves” flapping around.   Those were really intriguing to me and I almost went that direction.  But, after thinking about it and remembering about how I camoed up my shotgun and then later the bow quiver…remember those two camo jobs?

Here is a reminder:

CamoQuiver

I set my mind to doing just that to my bow.  Keep in mind, my bow is not the most expensive one on the market, but it does seem to send an occasional arrow to the mark I’m trying to hit (I still have that 5 months to make those arrows hit that mark more often than not) and so for me to experiment with a camo paint job is not something I am afraid to try.  I got out the same mix of paints I used on that bow quiver, sat  back and looked at my bow limbs and then bit the bullet.  Grabbed up some fine sandpaper and went to roughing up the surface.  I can tell you right now, once you touch the surface of that shiny fiberglas with sand paper, your mind just says…well, dummy, you’ve done it now, you might as well finish what you started….

I spray painted on some “flat” tan color and let it dry.  Then I got out some flat black and another color of lighter tan, also flat…..you have to have the “flat” paint because you don’t want your camo job to shine in the sunlight.  It will shine enough because flat is only so flat.  With the other two cans of paints I just sprayed a dab here and there to break things up a bit.  I could have stopped right there but I was on a quest and had to keep adding more to it.

I was sitting here thinking about the “colors” of the woods in August and September and in my minds eye I could see differing shades of greens, some light to dark yellows and oranges and of course lots of browns and blacks and greys.  I have all those colors in little bottles in Sherry’s area, the same paints the kids use to paint pumpkins for halloween.  I like those little bottles of paints.  Water soluble and flat colors.  I dabbed those here and there on the limbs as well.  Sometimes in the length direction of the limb, sometimes across.  And then when I figured I was all done, I sat back and looked at what I had in front of me.

As a “next to finishing touch” I added my signature squigglie!  BearsButtSquigglie

I was pretty happy at this point and the last thing that was needed was to spray the whole shooting match with “flat” clear lacquer!  When that was dry I took these pictures!

BowLimbCamo

BowLimbCamo2

UpperLimbCamo

CloserOfBow

So, there you have it!  My camo bow!  I only put the paint on the side that will face the animals when I’m drawn back and I stayed away from painting the wood riser.  I’ll do something with that before the hunt but I don’t want to paint it, I like the wood look.  I’ll most likely cover it with some of the wrap tape.

And this is what it will look like to the big old buck that comes to water next August!

QuakieForest

March 29, 2016

Bears Butt


Written on March 29th, 2016 , Archery stuff
By: Bears Butt

LittleBoat

With the ice off nearly all the lakes in the state it is time to start thinking about getting the boat ready to hit the water.  The last two summers have been so bad for my fishing that I did not take the boat out even one time!  My Bad!  That won’t happen this year!  Folks are already hammering the fish at the waters in Northern Utah and taking some nice (and big) trout, walleye and catfish!  I need to stock the freezer up with some catfish fillets!

I can also see a time to take the bow out and do some carp shooting as well!  Now that would be a blast!  Forget the form!  Just shoot!  Pull those carp in and you have enough bait for the next cast!  Oh ya baby!

So, with fishing on my mind I went looking at the new fishing nets that are out there.  Someone is always coming up with something bigger and better and sure enough I found something!  It might not be bigger, but for the size of fish I usually catch it is plenty big enough.  The unique thing about this one is the storage…it is just a long tube until you want it to be a net and then the net comes out of the handle and becomes the landing net you need.  I doubt it would hold a big old tiger musky but it surely would hold my 3 pound catfish (I always catch 3 pound catfish)!

So, take a look at this video and make your own decision.  For sure it would keep the net material out of the sunlight and keep those UV rays from destroying the net!  It would also keep it out of the way while you were carp shooting with your bow or just lazying around on the boat waiting for a bite!

I hope you enjoyed seeing this!

March 25, 2016

Bears Butt

Written on March 25th, 2016 , Fishing Stories
By: Bears Butt

GroundsOn25th Photo was one I took off the internet.

Sherry had a hair appointment in Ogden this morning and it was going to take a couple of hours to get it done.  So, what was I to do in the meantime?  It didn’t take long to decide I needed a cup of coffee and I had never been to the Grounds for Coffee on 25th street, so off I went!

This little gem is owned by Sadie Clifford….who, by the way, is the daughter of Twister (Al Clifford).  I was in hopes of seeing her while I was there, but like a good boss she was away and letting the employees run the place!  I have not seen Sadie since she was a little girl and Twister would bring her and her sister to the rendezvous up on Curtis Creek…THAT was a LONG time ago!

Well, I ordered “A cup of coffee”….I have no idea what kind it was but it was very strong!  I have not had coffee like that since the deer hunt of ought six!  BUZZZZZZZZZZ!

Looking around inside the place there were lots of folks in there studying whatever it was they were studying.  Some just looking at the internet and it was obvious that others were studying courses probably being taught at Weber State University.  As I sat there the people were coming and going…some sitting and talking with friends who also had come in for a “cup of jo”.  It was a very interesting visit for me and I was very pleased to see the place doing so good.

Before I left I had to take a picture of the pretty girls that were heading up the place.

GroundsForCoffee

Very attentive and busy doing whatever it is they do when not waiting on customers.

So, for all of you with a desire to have a great cup of coffee, maybe a bagel or donut or some fancy flavored coffee…stop in at Grounds for Coffee on lower 25th street in Ogden!  You won’t regret it!

Bears Butt

March 18, 2016

Written on March 18th, 2016 , Uncategorized
By: Bears Butt

BearsButtWithPants

Written on March 5th, 2016 , Jokes I like!
By: Bears Butt

Thinking about the upcoming archery hunt and how I need to be getting prepared for that hunt.  I’ve pretty much decided on they arrow I’m going to use and the feather (fletching) shape and mounting I am going to have on that arrow.  Now it is time to decide on what broad head to put on the front end of that arrow.  There are SOOOO many different kinds, shapes and designs and I’m sure everyone of them will put down a deer or elk if the hit is proper.

With my traditional bow, I will have to be quite close to that animal in order to even think about drawing back and shooting (20 yards max).  And with that I want to make sure my shot goes where I want it to go and do the damage necessary to bring that animal to its death quickly.  In my study of broad heads it was brought up several years ago by a traditional archer I know that the use of a “Single Bevel” broad head is something to consider.

SingleBevelBroadheads

These are just one type of this design, but they look like they are “tough” enough to break some bones should they hit one.

Again in my search, I have found that even Ice Augers have a single bevel to the blades.  The action of the blade cutting ice causes the auger to actually want to embed itself into the ice.  That is how the thing works.  The cutting effect of the single bevel causes the blade to want to cut away from the bevel.  Let’s look at a pocket knife that is sharpened on one side and the other side is flat.  If that bevel that causes it to be sharp is on the left side as you are holding it, the tendency of the blade will be to cut in a counter clockwise direction when you slide it into something, say a block of cheese or a chunk of meat.  If it is sharpened on the other side it will want to turn clockwise.

Single bevel broad heads do the same thing.  So, the two edges of the blade are sharpened on only one side and when they hit an animal they twist as they travel forward.  In fact, they twist hard enough and with enough force to cause bones to break!  Most mechanical and/or two to four blade fixed broad heads won’t do that, in fact when they hit a bone they generally will either break or they will just stick into the bone and stay there.


So a single bevel broad head is becoming more and more intriguing to me.  Give the fact that the kill zone of a deer/elk or what have you, is only SO big and there are leg bones and shoulder bones in that general area as well, what if my shot takes the arrow into one of those bones?  I think I would be giving myself a better chance of a “recoverable” kill if I was using one of these types of broad heads.

Single Bevel Damage

Anyway, my buddy Darin Gardner, turned me on to this video a few years back to help me understand how these bad boys work.  Check it out for yourself.

There is a lot of information in this and the good Doctor Ashby goes into a lot of depth explaining the damage that this type of broad head does.  It was especially interesting when he said he had never lost an animal to a gut shot with one of these and that his recovery was quicker than a normal gut shot would have been (if it was ever recovered at all).

Anyway, what are your thoughts on this?

Bears Butt

February 12, 2016

Written on February 12th, 2016 , Archery stuff

BearsButt.com | Stories, Ramblings & Random Stuff From an Old Mountain Man is proudly powered by WordPress and the Theme Adventure by Eric Schwarz
Entries (RSS) and Comments (RSS).

BearsButt.com | Stories, Ramblings & Random Stuff From an Old Mountain Man

Just some of my old stories, new stories, and in general what is going on in my life.