It’s raining and snowing outside and no reason for me not to continue to get ready for the archery hunt coming up in 5 months….that seems like a long time but for me it isn’t. I have lots to do, especially practice shooting to be ready for the hunt. Part of that preparation is getting my bow camouflaged. I’ve been putting a lot of thought into it lately and there are lots of ways I could go. A good camoed up bow could look like this:
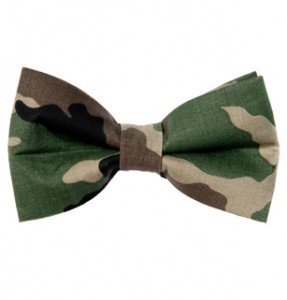
Where did that come from? Not a camo bow tie! Good grief. Has my site been hacked? Is my guardian FortiPress not working? Everything is fine folks. I put that one in to get your attention.
Camouflage has been around a goodly length of time and it has and is changing constantly. New ideas keep popping up as to what the clothing and other cover-ups need to look like in order to hide you the best. It mostly catches the hunters as I don’t think we know what the animals are seeing. We could be standing out like sore thumbs. I know of at least one hunter who doesn’t believe in camo much and wears his plaid shirts and relies on being down wind from his game. He is a good “killer” of animals as well, so his methods work. I personally like to look the part. You know the guy in the truck all camoed up from the top of his head to the bottoms of the soles on his boots. You never know when you are going to have to sneak up on the beer cooler.
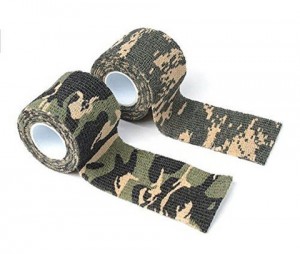
Well, my choices are plenty as to how to camo my bow. I could buy some of the commercially made wrapping tape. It goes on quickly, is quiet in the brush and comes off without leaving a big mess. It comes in a variety of camo patterns too, more than one would know for sure and it would take me all day to figure out which pattern to buy.
These are very nice and I got to use it a couple of years ago on the turkey hunt. Weasel let me take the shotgun with it wrapped on. It was easy and sure enough hid the shotgun well. So well in fact I could have lost it when I set it down once to go relieve myself. It’s funny how camouflage works. Here you are sitting in your spot up against a tree and along comes another hunter and takes a leak right on you. Of course he has to go drop his drawers and clean up after you cough and move. Ah yes! Camo!
There was another very tempting type of camo for my bow limbs. It is made like a skinny sock and you take the string off the limb and put the sock over it, then put the sting back on. The tension of the string against the sock,keeps the sock up tight on the end of the limb, while the lower part (closest to your bow hand) fits snug against the riser. Again, they come in all the patterns out there.
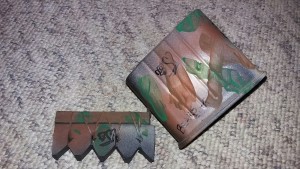
There are even “ghillie suit” kinds, with all the loose “leaves” flapping around. Those were really intriguing to me and I almost went that direction. But, after thinking about it and remembering about how I camoed up my shotgun and then later the bow quiver…remember those two camo jobs?
Here is a reminder:
I set my mind to doing just that to my bow. Keep in mind, my bow is not the most expensive one on the market, but it does seem to send an occasional arrow to the mark I’m trying to hit (I still have that 5 months to make those arrows hit that mark more often than not) and so for me to experiment with a camo paint job is not something I am afraid to try. I got out the same mix of paints I used on that bow quiver, sat back and looked at my bow limbs and then bit the bullet. Grabbed up some fine sandpaper and went to roughing up the surface. I can tell you right now, once you touch the surface of that shiny fiberglas with sand paper, your mind just says…well, dummy, you’ve done it now, you might as well finish what you started….
I spray painted on some “flat” tan color and let it dry. Then I got out some flat black and another color of lighter tan, also flat…..you have to have the “flat” paint because you don’t want your camo job to shine in the sunlight. It will shine enough because flat is only so flat. With the other two cans of paints I just sprayed a dab here and there to break things up a bit. I could have stopped right there but I was on a quest and had to keep adding more to it.
I was sitting here thinking about the “colors” of the woods in August and September and in my minds eye I could see differing shades of greens, some light to dark yellows and oranges and of course lots of browns and blacks and greys. I have all those colors in little bottles in Sherry’s area, the same paints the kids use to paint pumpkins for halloween. I like those little bottles of paints. Water soluble and flat colors. I dabbed those here and there on the limbs as well. Sometimes in the length direction of the limb, sometimes across. And then when I figured I was all done, I sat back and looked at what I had in front of me.
As a “next to finishing touch” I added my signature squigglie! 
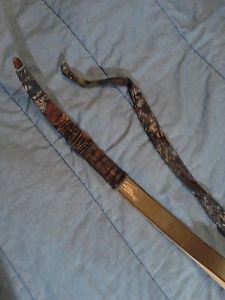
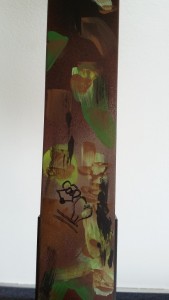
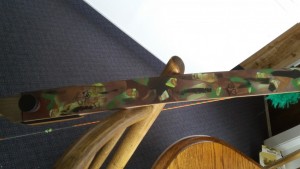
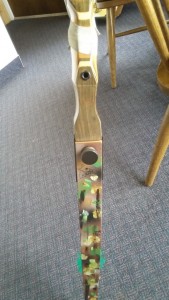
I was pretty happy at this point and the last thing that was needed was to spray the whole shooting match with “flat” clear lacquer! When that was dry I took these pictures!
So, there you have it! My camo bow! I only put the paint on the side that will face the animals when I’m drawn back and I stayed away from painting the wood riser. I’ll do something with that before the hunt but I don’t want to paint it, I like the wood look. I’ll most likely cover it with some of the wrap tape.
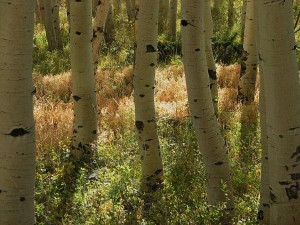
And this is what it will look like to the big old buck that comes to water next August!
March 29, 2016
Bears Butt

 Utah Fishing Reports

Looks good, hope everything shoots good and the arrows go straight.
Really looks good Mr. Butt!!!
hi
Can you explain how you made thecamo longbow lim socks ?
Regards
jean marc from France
These are not camo limb socks. I actually painted right onto the limbs.