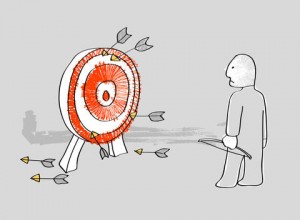
The big question: Is it “Knocked” or “Nocked”, when shooting arrows? In my mind, if someone said they are are knocking an arrow, they would be putting it down. And not dropping it or laying it down either. Like, “These arrows aren’t worth the carbon they are made of”!!! Or “If I had a crick, I’d throw all these arrows right into it”!!!! Just a side note.
———————–
There sure is a lot more to shooting an arrow to a point you want it to hit than meets the eye. I used to think you picked up the bow, nocked an arrow, pulled back and let it fly. If you were lucky it would hit where you wanted it to hit. I suppose there is a lot of truth to that. Actually there is a LOT of truth in that. But, if you want to hit where you want to more often than not, you have to follow the rules (always stinking rules).
So, I have had 3 lessons so far and these are the rules I have learned to date. And they are the rules I try to follow every time I shoot, however, sometimes I keep forgetting some of them.
Safety. Always be safe and never nock an arrow while people are still down range. And of course never shoot an arrow at anything you don’t want to either pay for or eat. So, those are the easy ones. Second, third, forth, fifth and I’m sure there will be a host more coming, all have to do with shooting consistently and hitting consistently what you are aiming at.
Your stance has to be about a 90 degree angle to your target and be relaxed. Arrow nocked and pointing downward on about a 45 degree angle in front of you. Raise the bow to be parallel to the ground and the arrow pointing in the general direction of the target. With a light hold on the bow, draw back the arrow using your other hand to hold the string. As you draw back, your elbow will rise above your shoulder. Continue drawing back until your hand reaches your jaw or face and the bow string actually touches your nose (usually the end of the nose). With your hand touching your face or jaw and the string touching your nose, you have located your anchor point. Look down range at the very point on your target you desire the arrow to strike, keep looking at that small point. Now for the release of the arrow, your fingers will slowly relax allowing the string to fly forward carrying the arrow, and your releasing hand and fingers are to move backward across your cheek, or neck toward your rear shoulder. If you are a right handed shooter, your “string holding” hand will move back over your right shoulder.
In my short archery career, whenever I have done all these things properly, my arrow will generally go where I like to see it when I have shot. I have discovered I have a very long way to go. I’m told by those who have been shooting for years and years, that at some point all of this will become second nature, like riding a bike or shooting under the belly of your horse. (None of them have said anything about shooting under a horse, I made that up).
Well, I have been practicing all of these things and so far, it is not a natural anything as yet. I have also been visiting the web and watching Youtube.com for videos on archery stuff. There is a lot to learn on there.
Today I saw a video about a “second anchor” point, one for your string holding hand. This guy shoots traditional bows and is pretty good at a bunch of stuff I shall call trick shooting. But I think he is sincere about this video and its main point….finding a place for your shooting fingers to end up. Consistency is the name of the game in archery. Nobody can help you straighten up your shots if you are flying all over the place and not being consistent in what you are doing.
I’ll post up the video so you can see it if you want, but let me tell you about his theory. I watched the video and grabbed my bow and went out in the garage to see about trying his idea. I set up my target and walked back to ten yards. Nocked up an arrow and thought about all the rules, bow up, draw back, anchor point, string against my nose, look at the center of the “x”, and now I had to conscientiously think about the video and what he said, end up with my fingers touching my ear. I kept thinking about all of these things while looking at that tiny spot on my target, the arrow launched in a perfect arc and landed near the x! HMMM. Let’s try it again.
I continued to do this until I was pretty much wore out from shooting. Well over 100 arrows shot down range. Here is a picture after I had shot 12 arrows using this technique.
 Let’s get a closer look at this:
 As a four week old archer I feel pretty dang good about shooting like this and so, I will be employing this man’s idea more and more in the next few weeks. Take a look for yourself, maybe his idea will help you become a better archer.
Bears Butt
January 25, 2015


 Utah Fishing Reports
Good Stuff!