By: Bears Butt

stew

It’s about 60 degrees outside and that is plenty cool enough for me to think about either chili or stew.  I tossed a coin in my head and decided I’d make up a batch of elk stew.  Being’s how I’m pretty lazy, I also decided to do it in the crock pot, that way I’ll have enough of the day freed up to go down to the duck club and look around.  It is the opening day of duck season today.

From the freezer I took out one package of elk meat marked “stew”, that is one from the cow I shot last fall and I also took out one marked “S.J. chops”….SJ stands for San Juan and even though the chops are from the back strap of the animal, it was from my bull and trust me when I say it is tough!  Even the broth that is left in the pot after cooking that old bull is tough.  And so, to put back strap meat into a stew, in this case is a good decision.

So, about 2 pounds of meat was cut into chunks and tossed into the crock pot.

You know me by now that I don’t go to any recipe book to put together most of the meals I make, I just fly by the seat of my pants.  And as long as I’m not cooking Vienna/Kipper Enchiladas, I’m pretty sure it will taste good, no matter what I toss into the mix.

Next I went to the fridge and the crisper, where Winemaker keeps all her veggies.  I dug around in there and found some green onions that would be going bad in a few days, a bag of carrots and saw some green pepper chunks.  I didn’t take the green peppers as we still have some out in the garden.  I went out there and picked all the ones ready to be picked and chose two of them to go into the pot.

The green onions were peeled and the big ends cut off and chunked up and into the pot they went.  I peeled two of the carrots and chunked them up as well.  Then cut and cleaned the green peppers, sliced them lengthways, diced them and in they went.

I went to the basement and retrieved a medium yellow onion and three small potatoes.  The onion was peeled and diced up as were the spuds.

A lot of folks like to put in a lot of spuds in their stew and some times I like to do that too, but not this time.  My emphasis this time is on the meat!

With all of that in the pot, I took both hands and mixed it all up pretty good.  Then added the spices….about a teaspoon of garlic pepper, one of beef bullion (why?  Cuz I saw it there), one of diced dried chives and one of season salt.  Then I topped it all off with one of plain old table salt.  Poured in a cup of water and added about 2 tablespoons of Worcestershire sauce, then thought to myself…..Hey!  Wouldn’t some barley taste good in there?  And so I added about 1/4th cup of barley to the whole mess and put the lid on it.

Now it’s about 11 a.m. and the crock pot is set on high.  I figure it will be done about 6, just in time for supper.

Time to head for the duck club for a look-e-see!

Bears Butt

October 4, 2014

Written on October 4th, 2014 , Recipes
By: Bears Butt

Corned Beef and Cabbage 2

Last Fall (Winter) I was fortunate enough to shoot a couple of elk and with one I took the brisket and made a couple of corned meat roasts.  We already ate one of them and it was not much different then the store bought corned beef.  So, tomorrow Winemaker is planning on cooking up the second one using a different recipe, one that I think Hot Spark uses in the crock pot.  Anyway, she asked if I’d go get it out of the freezer and put it in the fridge to thaw.  When I took it out of the freezer I noticed it was only partially frozen!  What the What?  I thought.  It’s been in there since early December, it should not be partially thawed.  And then my mind went directly to the freezer not working.  A quick rush to the freezer to find out everything is just fine.  All the other packages of meat are solid as rocks…wheewww.

Well, I opened up the zip lock bag the corned elk is in and smelled it…smells just like corned beef to me.  So into the fridge it went.

Then thinking something is up, I came to the computer and looked up freezing corned beef.  Sure enough there are a ton of articles on freezing corned meat and most of them say to repackage it out of the brine solution you marinade it in so that the brine does not keep it from freezing.  That is what I did not do.  But the articles also say the meat is pickled anyway and even if it wasn’t in the freezer it will still be good….another wheewww.

So, there you have it….Corned Elk, frozen in the brine you soak it in will last upwards of 6 months in the freezer before you have anything to worry about and a quick check with the USDA boys and girls website, confirms that.

Bears Butt

July 17, 2014

Written on July 17th, 2014 , Recipes
By: Bears Butt

I wish I would have taken a picture of the plate of food, but I didn’t….sorry….We had company come in from California for a couple of nights and so we felt it very important we feed them well.  Our first night we served them BBQ t bones with baked spuds and salad…always a good plan.  It was very yummy with lots of left overs.  Yesterday morning, without asking our guests which sounded best to them, I took the liberty to just cook a variety of meats and then serve it with hash browns, scrambled eggs and toast.  That went very well, because the meats included Ham, Bacon and Sweet Breads.  They had not tried Sweet Breads before and so I served that in the middle of the table still in the frying pan and they could taste them at their pleasure….as usual, they loved them and so every last morsel was consumed!  I loved that.  I even sent them home with a batch ready to heat and eat, and two packages of the raw product for them to separate on their own to get the feel for how much work goes into preparing them…OH and also I rubber banded a “Bears Butt dot Com” card to one of the packages and a note to search for “Sweet Breads”….They were happy.  But all of that is not why I’m writing this, it’s because of the meal that was served last night that drew me to writing this:


ELK STEAKS WITH HONEY AND LEMON GLAZED CARROTS

I was at a loss as to how to prepare my meal for them and so I sat back and thought I should marinade the steaks in something different than they may have had in their past.  I came up with a whiskey marinade that consisted of 1/4 cup of whiskey, 1/4 cup of Worcestershire sauce and a large tablespoon of Garlic Powder.  I combined the ingredients in a plastic bag with a zip top, made sure all the garlic powder was mixed well and then dropped in the elk steaks.  Those of you who have processed your wild game know that the pieces do not come uniformly sliced and so this was a mix of some large and some smaller chunks of good old elk steak…just like I like them.  I sealed the bag up trying to get as much air out of the bag as I could.  This I set aside on the counter top to make sure the meat came to room temperature before I cooked it…just my way of doing stuff, and kept turning it whenever I thought about it.  This marinaded for about two hours.

Well, with the meat on it’s way, I had to come up with a side dish and could not find much on the internet.  I had looked in the refrigerator and saw that we had a full bag of baby carrots and thought to myself those would be a great side dish, but not just boiled and served with butter, salt and pepper, but it needed a twist of some kind.  Back to the internet and I found a honey/lemon glaze recipe.  That sounded good to me and so I mixed up the concoction for that.  This is how I put it together, not entirely following the recommended recipe I had found.  I suppose I changed it enough to be able to call it mine, but I won’t.

For the 1/2 bag of baby carrots I planned on cooking for the four of us, I mixed up 1/4 cup of real honey, 1/4 cup of lemon juice, 1/4 cup of chopped yellow onion and two tablespoons of butter (margarine).  I heated it in the microwave to liquify the honey and then mixed it all very well.  Setting it aside until we actually got ready to fix the meal.

Along with this I would boil up a few red potatoes and serve that with drippings gravy.  I knew dang good and well I would not have any drippins in order to make the gravy but I found an “instant mix” beef gravy packet in the cupboard and that would have to do.

When Winemaker got home I conversed with her about my plan and all was well except the sound of the carrots.  Sweet and sour carrots did not strike her as something we should be serving our guests and so she added that just in case they didn’t like the carrots, she would steam some fresh out of the garden broccoli heads…Ok, there you have what was finally served.

When it came time to put it together and get down to eating, I boiled up the carrots and the spuds, made the gravy for the spuds.  Drained the carrots and poured the honey/lemon mix over the carrots and mixed them all together to coat them well.  Out at the BBQ grill the steaks went on a very hot grill and then turned down to low while I kept the steaks turning round and round on side one (ain’t no sense having the grill lines all going the same direction).  When I felt like they had been cooked enough, I flipped them over and did the same round and round turning.  When I thought they were about done I asked Mike (one of the guests) how he felt they were done to that point…He said they needed more time to become Medium Rare…once we concurred they were at that point in we went to eat.  The ladies were ready and so were we.

With it all served up and all of sitting down, I just had to try the carrots first…it was the “Iffy” dish on the plate….With all my senses on the flavor of the carrots I took a bite….To my surprise they were EXCELLENT!  And everyone else thought the same.

So for all you game hounds out there with a freezer full of good old wild game steaks…get after this meal!  You won’t be disappointed!

Enjoy!

Bears Butt

June 29, 2014

Written on June 29th, 2014 , Recipes
By: Bears Butt

StringNumbersungodly_amount_of_food

Winemaker found and then made this recipe for our supper last night.  I’m all about good food and she does a very good job at mixing things up.  I could eat burgers, venison, elk, beef, chicken and fish pretty much all the time, but she has to have different stuff from time to time.  This Mushroom Asparagus Quiche had been on her mind for a few days and when we dove into it last night I could hardly come up for air!  It was delicious!  I told her I had to have a copy to put on Bears Butt Dot Com!  So here it is.  All rights go to “Taste of Home”…..

Bears Butt

June 4, 2014

Written on June 4th, 2014 , Recipes
By: Bears Butt

Here is a twist that Winemaker and I came up with, a left over Taco Burrito!

Whenever we make tacos, there is inevitably lots left over.  It’s kind of like making spaghetti,  I always make too much.

So, you make the taco’s like usual, a pound of ground meat, add the packet of taco seasoning, heat and mix as directed and serve with shredded cheese, shredded lettuce and assorted other stuff you like on your taco, add a side of re-fried beans and you are good to go!

After indulging in that to satiation (completely full), the leftovers of the ground meat mix is blended with the leftovers of the re-fried beans and put into the fridge for the next day’s lunch or whenever.

So, Winemaker was going through the fridge this morning and said, Hey, there is just enough left over taco stuff we could make a burrito for each of us for breakfast this morning.  Just add some egg and you’re done!  OK!  I said…done!

I got out a couple of large burrito shells and fired up the burner.  Put the taco blend into the microwave and heated it for 2 minutes.  Broke 3 eggs into the mix and blended that all up and back into the microwave for another minute.

In the meantime I timed the burrito shell being done at the same time as the taco mix.

I had to stir the egg/taco mix two times until the eggs were done and cooked for a total of 3 minutes with the eggs.  Then I added a cup of shredded cheese and stirred that in.

This mix was scooped into the burrito shells and rolled as usual to make a burrito.

I ended up with 4 burritos, and so there will be another breakfast with those!

Pretty yummy if you ask me.  It’s looking like almost anything can be made into a burrito, EXCEPT, Kipper Snacks and Viennas!  Stay away from that combo!

Bears Butt

January 31, 2014

Written on January 31st, 2014 , Recipes
By: Bears Butt

FOOD!  I love food!  Especially Breakfast and REALLY ESPECIALLY if it involves steak!

But, today’s breakfast did not have a true steak involved, but the next best thing…a cubed pork steak!

I asked Winemaker if she would like her steak covered in gravy and served atop a piece of toast…she declined, but in my mind I just had to have it!

So, the plan was, hashbrowns, toast, breaded and fried cubed steak and two eggs cooked over medium.  Mine would have the addition of “drippins gravy” poured over my meat which of course would be atop my toast.

I went to work making sure I didn’t over salt the main portions and to make sure there were lots of drippins to make the gravy from.  Everything turned out perfectly.

So, there I was with the flour all stirred perfectly with the drippins and my thoughts went to the fridge where a cup of buttermilk remained in the carton.  I thought, well Bears Butt, you don’t have buttermilk biscuits, so why not make buttermilk gravy?  I have never heard of buttermilk gravy…again my mind raced to a new entry to Bears Butt Dot Com…No way could it be a repeat of “kipper/vienna enchiladas”….

And to the flour in the pan, went about a half cup of buttermilk right out of the carton.  A few quick stirs and it was ready!  MMMMM!  It smelled good and my mouth began to water.

After cooking up two eggs for each of us, I served up the concoction and we sat down to eat.  Winemakers  looked like “breakfast ordinaire”, while mine had a look of something from Moores restaurant!  There was a lot of gravy and so I even covered my spuds with it!

The meal was pretty good, but for you out there who might like to try this, I have to tell you the gravy was a bit rich for this kid.  If I ever have an inkling to make buttermilk gravy again, I will cut the buttermilk in half using water to dilute it.

Now I really like buttermilk on occasion but this gravy was pretty rich in my opinion, however, if you like that taste, don’t cut it at all, it still wasn’t bad.

Bears Butt

January 12, 2014


Written on January 12th, 2014 , Recipes
By: Bears Butt

Today, since the snow Gods have thus far favored my schedule and I don’t have to plow as yet, I decided it would be a good day to make up a batch of Corned Elk Brisket in anticipation for whenever we decide to have corned meat.

I thawed out 6 1/2 pounds of brisket meat I had saved just for this when we cut up the elk.  I now have a batch of brine cooling and when that is cooled I’ll put the meat into a plastic bucket I have and pour the brine in on top of it.

The meat should be ready to go back into the freezer on Tuesday!

Bears Butt

January 9, 2014

Written on January 9th, 2014 , Recipes
By: Bears Butt

HotDogMouth

This morning I tried a new to us recipe on Winemaker.  Unlike the vienna, kipper, enchilada this one turned out pretty good.  It’s not a new one by any means, it just saved on having to do any dishes.

On this site,  you have probably seen the recipe for “Bowern Omlettes”, well this is pretty much the same with just some tweaks to make it interesting.  The end result was very good!

I’m calling this the “Bowern Buritto”.

For two people:

Toss in a pretty good handful of hash brown potatoes into a pan with only the spray non stick stuff as the grease.  Begin to get them frying.

In the mean time, cut up some ham into diced chunks, about 3/4 cup of ham chunks, toss them into the pan with the spuds.

Dice up some onions, green peppers and whatever other veggies you like, toss them into the pan, stir often.

Dice up a very nice sized dill pickle!  Yes Dill Pickle…toss it into the pan with the other stuff.  Now heat it all for a bit.  You want the pickle juice to permeate the rest of the ingredients.

Break and scramble three eggs into the mix!

Now, add a handful of shredded cheddar cheese.  Stir it up until the cheese is melted and thoroughly mixed.  Set the pan to the side.

Grab onto some burrito shells or even tortilla shells (they are smaller, but do the same thing).  Heat them one at a time flipping them over in a pan (please, NOT the same pan that has the mix in it) a few times, until it’s almost too hot to handle with the bare hand.

Place the hot burrito shell on a single piece of aluminum foil, put a nice glob of the mix from the pan onto the shell  keeping it in a heaping row and toward one side.  Now roll it up as you would any burrito and then roll that up in the foil.

Done!

You can change things up by adding salsa to the mix in the pan as well if you like.  One thing about this is you don’t have to add salt, pepper or any other seasonings.  There is plenty of salt in the ham.

As our breakfast turned out, I had used tortilla shells (small ones) and because of the potatoes in the mix and the flour shell, we were both very satisfied with one of these as the main course.  Add a half glass of orange juice or milk and you have just had a very, very good breakfast!

You read it first right here on Bears Butt Dot Com!

Bears Butt

January 9, 2014

Written on January 9th, 2014 , Recipes
By: Bears Butt

squigglyCHICKEN SOUP WITH HOME MADE EGG NOODLES

This has to be the easiest and greatest tasting recipe in my arsenal!

EDIT:

Things you will need…boring!

Flour

Salt

Eggs

A boiling pan

Water

Chicken

Onions

Seasonings

Heat source

Hey…did I forget anything?….people!  Never can figure things out for themselves.

Mixing bowl!

Hands!

How far back to you want me to go?  Farmer, field?  Chicken?  Egg?  Wheat seed?  God?

Excuse me.

======

First you have to make the noodles because they have to dry,  well, they don’t really have to dry, but the old time recipe I used says they do.  I have since found out they don’t.

For a small batch, like for just one meal for two to four people, mix one cup of all purpose flour (Wheat grinders?) with two eggs, 1 1/2 tablespoons of water and 1 teaspoon of salt. (Miners?)

How easy!

Mix with your hands (that’s the best part) (how often do you get the chance to break an egg yolk with your hand?) keep moving the mixture around gathering up all the loose flour.  When there isn’t any more flour in the bowl you’re done, at least with that part.

Now flour up a cookie sheet or cutting board or your counter top.  Plop that gob of mixed dough on it and spread it out thin with a rolling pin (Wood cutters?).  What if you don’t have a rolling pin?  Roll it with a plastic glass on its side (Plastic glass makers) , the butt of your palm, an unopened soda or beer can on its side (Aluminum miners and smelters?  I’m done with that!)…whatever it takes.

Now, this is important…let it sit for 10 minutes undisturbed…turn off all music in the house and don’t stomp your feet, be very quiet!  If you don’t let it be undisturbed for at least 10 minutes the noodles will be tough as owl crap and you don’t want that.

As it rests you can do the rest of the stuff quietly.

Get a pretty big boiling pan out of the cupboard and fill it about half way full of water.  Get the heat under it and continue to do the next few things.

You are going to need:

Chicken and Onions, salt/pepper/seasonings you like…that’s it! (Well according to some that is NOT it, but I’m writing this and I say…it is (quietly)!).

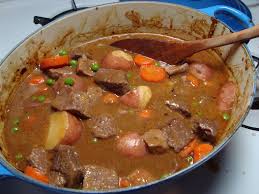
Cut up a lot of chicken into bit sized pieces, actually you can have them bigger than bite size cuz they will cook and break up later on their own anyway.  Just make sure you don’t have any bones in the mess of meat.  Bones are bad in any soup.  I like to put a ton of chicken in my noodle soup and I especially like to have the skin and fat in there as well (no feathers please).

DR. BEARS BUTT SAYS:  If you are ill, the best “fix you up remedy” is fatty chicken noodle soup with lots of onions in it.  Chicken fat is the Army (fighting mechanism) that combats the ugly bad boys in your body and the onions are the Chicken fats’ shield!  The noodles and chicken pieces are just to help your body get the nourishment you need.  If in a pinch, all you need is the chicken fat and onions boiled up in a broth and you will be well in no time!

Toss in the heap of cut up chicken into the pot of water.

Now get at least 3 large yellow onions out of the cellar and get them peeled and cut up into “shield” sized pieces (1/2 inch, they will shrink to fit the chicken fat sized bodies).  Now I say AT LEAST 3 large yellow onions, because you can add more and it will be better.  Chicken fat and onions…remember that!

DR. BEARS BUTT SAYS:  If the Chicken fat army has too many shields that will be just fine…too few shields is not a good thing for any army!

Put the cut up onions in the pot with the chicken!

Now look at your noodles.  HEY!  They aren’t noodles at all….YET!  Just a flattened out chunk of dough laying there all relaxed and all from not being disturbed!

Grab the pizza cutter and get to work!  Here you can be creative.  If you like to make words out of the dough you can cut words out.  I’d keep them thin, but whatever makes your day go good…do it.  Remember this, as the noodles cook they get thicker and thicker.  Not longer and longer, but thicker and thicker.

(Alphabet soup came from someones imagination and I’m certain they were in charge of making their mom some home made noodle soup when they made the letters out of the dough.  They may have been somewhat delirious from having to care for her and the other kids at the same time, while dad was at work or up at the local tavern.  I really don’t know, but that made a good spin on the whole thing…in my mind.)

So, now the noodles are cut…long, short, fat, thin, numbers, letters, whatever.  Now they need to dry (according to old time recipe I first used)…you can transfer the still gooey noodles over to a cookie pan and put it in the oven on 160 degrees, prop the oven door open with a wood spoon and leave them for about 30 minutes, or you can choose to just ignore them and within about 4 hours they will be crunchy dry.  OR, when you think the chicken and onions are done enough…plop those bad boy noodles right in on top of that boiling stuff and let it all cook away.

SEASONINGS:

I’m a salt freak…at least I used to be…in my older days, now, I use less and less, but still like what salt adds to a mix like this one.  So, with caution, add salt, garlic powder, pepper, season all, parsley flakes and whatever makes your pallet like what you are trying to get into your stomach…go for it!

DR. BEARS BUTT SAYS, Salt is always a good thing to put into your ailing body.  It helps you retain water a bit and for the bad boy germs that are trying to out flank the Chicken fat army, it makes for some slow going in the blood stream.

But go easy on the use of salt, it is bad for a lot of the other parts of your body and has been known to cause cancer in people who live in California.  Don’t ask me for my source of that one.  It just seems like everything that seems good for the rest of the people of the United States causes cancer in people from California…read some labels you’ll understand.

When the chicken is done…test often after 10 minutes of boiling…stir in  the seasonings…a bit of them at a time…taste after the boiling has commenced and stir often…add more…stir…boil…HEY!  Are the noodles dry yet?

Once you have the chicken/onion broth perfectly seasoned…add the noodles!  And let it simmer!  The noodles will absorb the goodness of the broth and make them swell with pride.  You too can swell with pride!  How many people do you know that have made their own noodles?  I’d venture to guess…maybe two!  And how many have made their very own chicken noodle soup from scratch?  I’d bet a six pack…the same two!

The whole mess is done when the noodles are done.  You will know when that is as one of two things will happen!  One:  You are beside yourself as to why the noodles just won’t get soft (because you didn’t give them their quiet time)!  Or Two: You are starved and you just don’t give a dang..you are gonna eat!

Bears Butt

December 22, 2013


Written on December 22nd, 2013 , Recipes
By: Bears Butt

I just have to share with you this recipe I just made up.  This is only my second attempt at this and am sure there are a lot of things that could be done differently to make it even better, but this didn’t turn out too bad.

3 pounds of ground venison (I’m sure Elk, antelope or any other wild game would work as well)

3 pounds of ground pork (88/12%)

2 TBL Mortons Tenderquick Salt

3 TBL Liquid Smoke

1/2 cup Maple Flavored Pancake Syrup

1 1/2 cups water

Mix very well!  It turns into a very sticky mess of meat, but trust me it will be worth the effort.  When you think it’s mixed well enough…well…mix it some more.

Put the whole batch into a wax paper lined pan 13X9X2 and press it down good to get out the air bubbles, cover with a Saran Wrap plastic and put it in the fridge for 24 hours (this lets the nitrites in the salt kill all the bugs in the meat).

After the 24 hours, dump the mix out onto a smoker wire rack and put in the smoker at 140 degrees for 3 hours.  This will dry out the mix pretty good and get it ready for smoke.

Add a handful of wood chips to the smoke pan and smoke at 155 degrees for 2 hours.  Don’t add any more chips than the handful, a little smoke goes a long ways.

Increase the smoker temp to 180 and let go for 2 more hours or until the internal temp of the meat mix reaches 155 degrees.  Now take it out of the smoker and put it in the fridge to cool.

When cool, slice it up in bacon thick pieces for frying.  Fry like any other meat.  You are going to love this stuff!

Bears Butt

November 28, 2013 (Happy Thanksgiving)!!!!

I’m adding this message to help you make perhaps a better recipe.

The above recipe produced a very dry bacon, with very little flavor.  So for my next batch, I increased the amount of Maple Syrup to one full cup, everything else remained the same.  The outcome was a very dry bacon that was too sweet for this guys fancy.  I decided at that point I needed to add more fat to the mix.

After a couple of weeks, I went to the store and bought a two pound package of suite.  Suite is plain old ground up fat, either from beef or pork.  The butcher told me my suite was mostly pork, but he added a bit of beef fat to it and that it would not make any difference to my recipe…we will see.

So, I want a 80/20 mix of meat in my final mix to make my bacon from.

I have 3 pounds of 88/12 ground pork and am adding 3 pounds of 100% ground venison…no fat…I did a quick calculation and came up with 14 ounces of suite should be added to my mix to give me the 80/20 I desire…so, again in my mind, why not just make it an even 16 ounces and be done with it…so that is what I did.

Thinking back to the previous recipes (batches of bacon), batch one was a bit salty for both me and Sherry, and so I backed off from 3 TBL to 2 TBL of the Mortons Tender Quick salt.  Because I want this batch (number 4) to taste a bit more salty, I increased the amount of salt back to 3 TBL.  WHY?  Because of the suite I’m adding.  I think it will absorb some of the saltiness and will disperse when cooked…just my way of thinking.

I also took out all of the maple syrup.  For me, it makes sense to take it out as a half cup didn’t add anything to the final result (my taste buds could not taste it), while a full cup was over the top for both Sherry and me.  So, for now…take it out!

Of course it has sat in the cooler for 24 hours and is now in the drying stage of the smoker.  Two hours at 160 today, as it is cold outside and then I’ll add some apple chips for smoke and increase the temp to 170 for a couple of hours and then will probably have to increase it to 180 until the internal temp reaches the 160 degree mark.

I will add the results of this batch 4 tomorrow when I have had a chance to taste test it!  How close do you think I am to a good recipe for venison bacon?

Bears Butt

December 22, 2013


Written on November 28th, 2013 , Recipes

BearsButt.com | Stories, Ramblings & Random Stuff From an Old Mountain Man is proudly powered by WordPress and the Theme Adventure by Eric Schwarz
Entries (RSS) and Comments (RSS).

BearsButt.com | Stories, Ramblings & Random Stuff From an Old Mountain Man

Just some of my old stories, new stories, and in general what is going on in my life.