
To make a dream catcher that will be your lucky charm on a Dream Hunt requires very few tools and not too much time. A perfect combination of things. It will cost you a little, maybe like two dollars to do, but that isn’t too bad either. In my little world of the Willow Creek Free Trappers (our mountain man groups name), the ring found on the end of a trap chain is a large part of our logo. And so, in order to make a dream catcher that is very special to a Willow Creek Free Trapper person, it makes perfect sense to use a trap ring to encircle that dream.
A person could go out a buy a trap ring if they so choose, but not me! I scrounge up some soft fencing wire out of the shed. It is 14 gauge and just pliable enough to get the job done, while still being stiff enough to stand up to the test of time.
So, with the wire found, we need a way to bend it in a nearly perfect circle. I found the bottom portion of an outdoor table umbrella for that part. It measures about 2 1/2 inches in diameter (across).

I have clamped this in my vise, but you don’t have to do it that way if you don’t have a vise. We will need a few tools to get this job done and one is a special type that can lock onto your wire and hold it tight. They are generally called vise grip pliers. Mine happen to be pointed. A second pair of pliers and some side cutting pliers.

To begin making our trap ring just wrap the wire around the pipe and as you come around to the beginning point, keep the wire close to itself, side by side if you will.

When you have made the full wrap around the pipe and have about two inches of wire out both sides of the mid point, take it off the pipe and clip it from the rest of the wire.

Grab up your locking pliers and take hold near the middle of where the wire is double. With the other pliers, take the end of the wire and bend it nearly straight up.

Excellent! Now you are going to wrap that short piece of wire around the other part of the wire, all the way around if you can.

WOW! You do good work!
We will now do the same on the other end of the wire. So, turn things around and bend and twist.

Once wrapped around you have successfully made a trap ring.

Now this ring is strong enough to hold most any critter caught in a trap #3 or smaller. But we aren’t going to use it for that. Remember? We are going to make us a dream catcher! Let’s go in and have ourselves a cold drink and think about the next step. But first, let’s clean up our work bench. Put those tools back exactly where you found them. A place for everything and everything in its place!

Ok! It’s time to get real creative and make our finished dream catcher. For this we will need some artificial sinew, string, twine, leather strap or whatever you want to put on your trap ring. The material chosen will be used to completely wrap the trap ring from one of the twisted ends around to the other twisted end.
Since I am making my dream catcher to be used as a good luck piece on my dream hunt, I am going to use artificial sinew. It comes in rolls like this, and costs about $9…there is a whole lot of sinew on that roll and it can be used for a bunch of stuff besides making dream catchers.
 Oh ya. The picture reminds me, we will need a pair of good sharp scissors too.
Unwrap a piece of sinew, string or whathaveyou about four (4) times the distance around your trap ring. I say this because you might be making a dream catcher that is made out of an old wooden tire ring, the kind that was used on buggies from the past. Or you might be making a dream catcher out of a basketball hoop. So, about 4 times the distance around your ring. Longer is better than shorter, but you could still tie onto a short one to make it big enough.

Ok, now the fun begins. We are going to tie one end of this around our trap ring really, really close to one of the wire twists. Make sure you tie a square knot or it could come loose. Square Knot? If you can’t tie a knot, tie a lot! I got that one from one of my nephews. You can go to:
http://www.animatedknots.com/
And learn how to tie a square knot. They are really easy.
 Now, let’s wrap the sinew around the ring. Keep the wraps close and maybe even overlapping. You want to completely cover any of the metal of the ring with this wrap.

Continue to wrap….

Done with the wrap!
 Now, finish it by tying it off using a half hitch. I like to use two half hitches, that way it won’t come apart.
 Nicely done!
The next step is to make our dream catcher. A dream catcher is actually a symbol of a spider web. Spiders spin their webs with sticky stringy stuff they produce in their bodies and when a bug flies into it the sticky stuff holds them there until the spider has time to come over and eat it.
Dream catchers work pretty much the same way, only we don’t use sticky string to make them….well…you might use sticky string to make yours, but I won’t use it to make mine. The thing about dream catchers is you put them over your bed and when you are sleeping the good stuff you dream about gets caught up in the web of your dream catcher and brings your good fortune and lots of good luck.
Since I am using sinew as my main string source, I need to pull my sinew apart in long strands. You don’t need thick string to make the “web” part of the dream catcher. You might want to use kite string, fishing line or some other sort of smallish string.
 The length of the string needs to be very close to the length used to wrap your ring. Any extra will be left hanging from the dream catcher for fun, or to tie something onto, like a feather or bead.
Tie one end of your string very close to one of the ends on the trap ring. Leave a couple of inches of your string hanging down.
 What knot did you use? Square knot I hope. Otherwise “tie alot”.
Ok, here is where it gets creative. There is no absolute place you are going to tie your string next, but what you will do is pull your string to “some point” up the ring and wrap it around the ring and pull it tight. I am going to go about 1/3rd of the way up the ring and tie it there. When I do, I will wrap the string around the ring, and have it come over the left side of the string. Look closely at this next picture for what I mean.
 It’s not entirely clear to see what I have done here as the loose end of the string is hidden behind the trap ring in this picture. But what needs to happen is when we go to our next spot to wrap our string, it needs to pull this wrap towards it and so that is why the loose string has to be on the left side of this wrap. All our wraps need to be this way. Maybe as we continue you will see a better example of what this looks like. Anyway, give this a try and see what becomes of it. You can always undo it and try again.
So, our next move is to again go about 1/3rd the distance around the trap ring and wrap our string.
 Pull these babies tight. You might want to even double wrap them. Your choice.
Go another 1/3rd the distance and do it again.
 Pull tight and then go to the ring end and wrap it there.
 Pull tight and go to where you started with this whole deal.
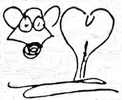
 Look closely at the pattern you have going. Pretty cool huh? That is why I said you can make these dream catchers as fancy or simple as you want just by wrapping closer or farther apart.
This next part is even funner. Our pattern is going to really start to take some shape as we go. It’s really easy isn’t it?
Now, take your string to the mid point of your first span of string.
 Pull this tight and go to the next span, again tie at the mid point.
 Pull tight, go to the next span.
 You still have mid points to go to…git er dun!
 Next one.
 And around we go!
 Hey! This is lookin pretty good! But, for my dream catcher I need to introduce a little figure of a big buck. A charm of a buck. Check it out.
 This little baby is what my dream is all about. Catching a big old muley deer buck! And so, what better to put in my dream catcher than one of these little babies? It has a loop hole on top of the antlers and I’ll be able to put my string right through that hole and tie it in the middle of my next span. This is getting more and more fun as it goes along.
 Pull tight and go to the next span!
 Pull tight, go to the next one.
 Pull tight and go baby go! Look closely, this loop is right under the deers front legs.
 We now take our string over to the tie point under the deers back legs. Tie it there and then go down to the main trap ring and tie it off. First we tie it off using itself and then double the tie using some of the loose string we left hanging when we started this process.
You can cut this last string if you like or leave it dangling.
Next cut another piece of sinew and tie it on the top of the dream catcher. This string will allow you to tie it to your bed post, hang it from the wall or rear view mirror or to your beaversharn! Mine will be hanging from my beaversharn!
You did a very good job at making this!
 I added a little bead on which I wrote “Dream Hunt” and put it where you see it using a separate piece of sinew. You can do whatever you like with yours. Get creative! It’s fun! And how much did it cost us? Hardly anything and who else has one just exactly like yours? No body! That’s who. Everyone of them is different, even though they might look the same at first. Enjoy!
Now Go to Work Dream Catcher!
Bears Butt
Oct. 2011
Here is another I made up for the winners of the United Wildlife Cooperative youth turkey hunt in 2012…..

I really LOVE your Dream Hunt dream catchers. Do you by chance sell these? If so, I would really like to buy one similar to the one on your page. Please let me know.
Thanks,
Allison
Allison, I only make them for special occations. To sell them for the time and material that in each one would not be worth it to you. Sorry. But just follow the directions, they go together quite well, it just takes time. Thanks for reading my blog!
Bears Butt